

The final inspection before settlement is your last chance to make sure the property is exactly as you agreed to buy it. This isn’t just a quick walk-around; it’s a crucial check to confirm the seller has held up their end of the deal before the keys are officially yours.
Why Your Final Inspection Is Non-Negotiable
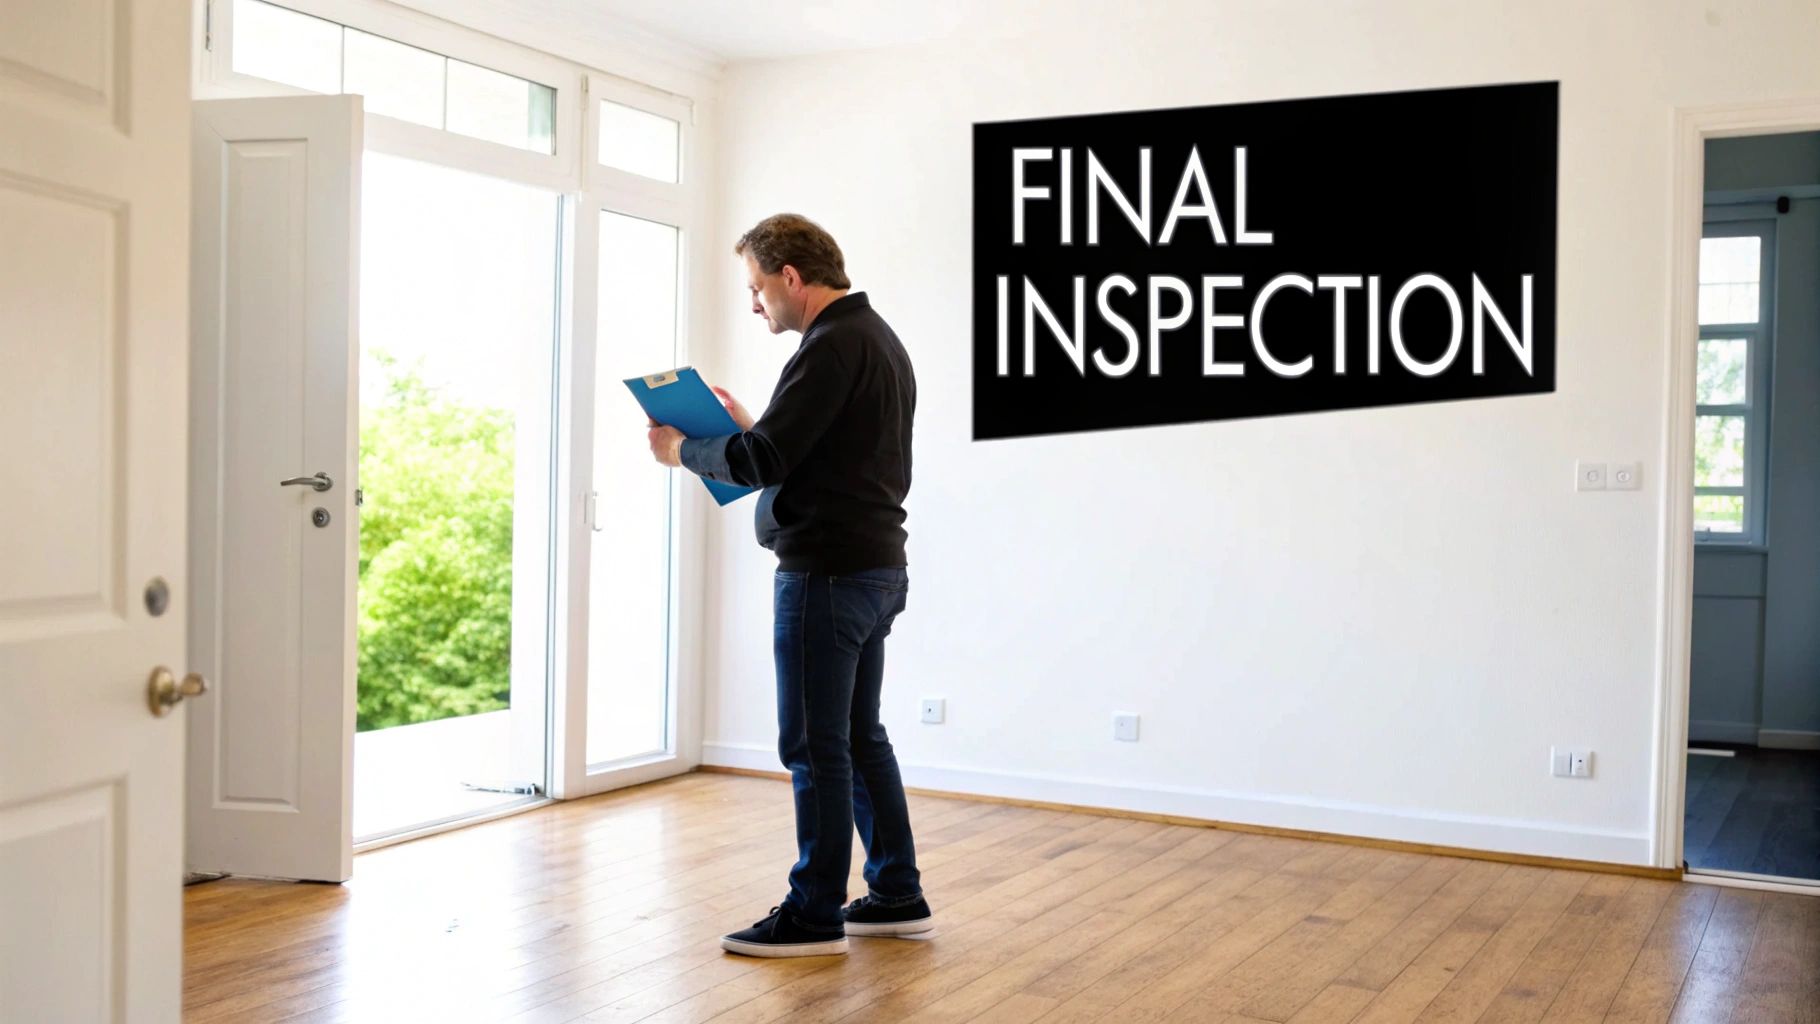
Think of the final inspection as your last line of defence. It's your one opportunity to confirm the property is in the same condition as when you exchanged contracts, allowing only for 'fair wear and tear.' Too many buyers get this wrong, thinking it's another chance to find faults or haggle over the price. It's not. The purpose is much more specific: verification.
This final check is a key part of what due diligence entails, ensuring there are no nasty surprises waiting for you after settlement. It’s all about making sure the vendor has done everything they promised.
Understanding "As-Is" And Special Conditions
Most standard contracts in NSW have an "as-is" clause. This is a powerful little phrase that means you accept the property's condition, good and bad, from the day contracts are exchanged. The final inspection is your tool to enforce this.
You’re really only checking for three things:
- No new damage: Has a wall been gouged while the seller was moving out? Is there a new crack in a window that wasn’t there before?
- All inclusions are still there and working: Are the oven, dishwasher, and air conditioner still in place and functioning just as they were?
- Agreed-upon repairs are done: If you negotiated for the seller to fix a leaky tap or patch a hole in the wall, now is the time to confirm it’s been completed properly.
This is where special conditions, added to your contract by a sharp conveyancer, can be a lifesaver. A common one is a clause requiring all appliances to be in good working order at settlement, giving you extra protection.
Inspection Vs. Viewing: What's The Difference?
It’s easy to get the different property visits confused, but they all serve very different purposes. Your initial viewing is for falling in love with the place. The building and pest inspection is for a professional to uncover any hidden nasties.
The final inspection, though? That’s all about confirming the status quo.
Your leverage is at its absolute peak right before you hand over that final payment. Once settlement goes through, getting the seller to fix anything becomes incredibly difficult, if not impossible. This makes the final walkthrough your most powerful moment.
The Australian property market is always buzzing, which is why being diligent is so important. In FY25 alone, nearly 722,000 properties were settled, a 3.2% increase from the year before. With so many transactions happening, a thorough final check is one of the best ways buyers can protect themselves.
To make it crystal clear, here’s how the different visits stack up.
Understanding Your Property Inspections
Here is a clear comparison of the three key inspections you'll encounter, outlining their distinct purpose and timing.
| Inspection Type | When It Happens | What You're Looking For | Who Is Involved |
|---|---|---|---|
| Initial Viewing | Before making an offer | Emotional connection, layout, location, potential | Buyer, real estate agent |
| Building & Pest | Before contracts are unconditional | Structural defects, pests, major hidden issues | Licensed inspector, buyer (optional) |
| Final Inspection | 5-7 days before settlement | Contract compliance, condition confirmation, no new damage | Buyer, real estate agent |
Getting these inspections right is a huge part of a successful, stress-free property purchase.
Nailing the Timing and Bringing the Right Team
When it comes to your pre-settlement inspection, timing is everything. Go too early, and you leave a window open for something to go wrong after you've signed off. Leave it too late, and you're scrambling to sort out any issues, putting your settlement date at risk.
The sweet spot is usually five to seven days before settlement. This gives you just enough breathing room to spot a problem, get your conveyancer on the phone to the vendor's team, and work through a solution without throwing your whole timeline into chaos.
Getting In and Who to Bring
Your first call is to the real estate agent to lock in a time. They have to give you access, so be confident in asking for a slot that fits within that crucial five-to-seven-day window. The agent will be there, but the real question is who else should be on your team.
You’re the star player, of course, but you don't have to tackle this alone. Here’s who you should consider having in your corner:
- A trusted friend or family member: Honestly, a second set of eyes is invaluable. They'll spot the scuff mark on the wall while you're busy making sure the dishwasher actually runs.
- Your conveyancer or solicitor on standby: They won't be there in person, but have their number ready. If you uncover a major issue—like a hot water system that's given up the ghost—they can give you instant advice on where you stand contractually.
- A professional building consultant: For some situations, this is non-negotiable. Their trained eye can be the one thing that stands between a minor fix and a massive post-settlement headache.
When to Call in the Pros
Look, you don't always need to bring a building consultant to your final walkthrough, but it's a very sharp move in a few key scenarios. If your original building and pest report flagged a few "watch this space" items, you'll want an expert there to give the final verdict.
And for new builds? It's an absolute must. A consultant is trained to see the subtle signs of shoddy workmanship or non-compliance that the average person would walk right past. This is your very last chance to hold the builder accountable before their problems officially become yours.
Think of it this way: The cost of a consultant for an hour or so is pocket change compared to what you'd pay to fix a dodgy waterproofing job or a poorly installed air-con unit you didn't spot.
When you're dealing with a complex property or just have that nagging feeling of doubt, professional building inspections are worth their weight in gold for peace of mind. You can learn more about how an expert can help during this critical stage by exploring our guide on professional building inspections. Having a pro with you means you get the hard evidence and technical jargon needed to back up any claims, giving your legal team the solid ground they need to negotiate effectively for you.
Your Comprehensive Pre-Settlement Checklist
This is it. The moment where the paperwork and contracts meet the real-world bricks and mortar. Your pre-settlement inspection isn't just a casual walk-through; it's your last chance to make sure you're getting exactly what you signed up for.
It’s time to put on your detective hat. You need to be methodical, checking everything from the hot water tap to the last light switch. This checklist is your game plan, broken down into the key areas you absolutely can’t afford to miss.
Take a look at this flow chart. It boils the whole process down to its essentials, from booking the inspection with the agent to calling your solicitor if you find something wrong.
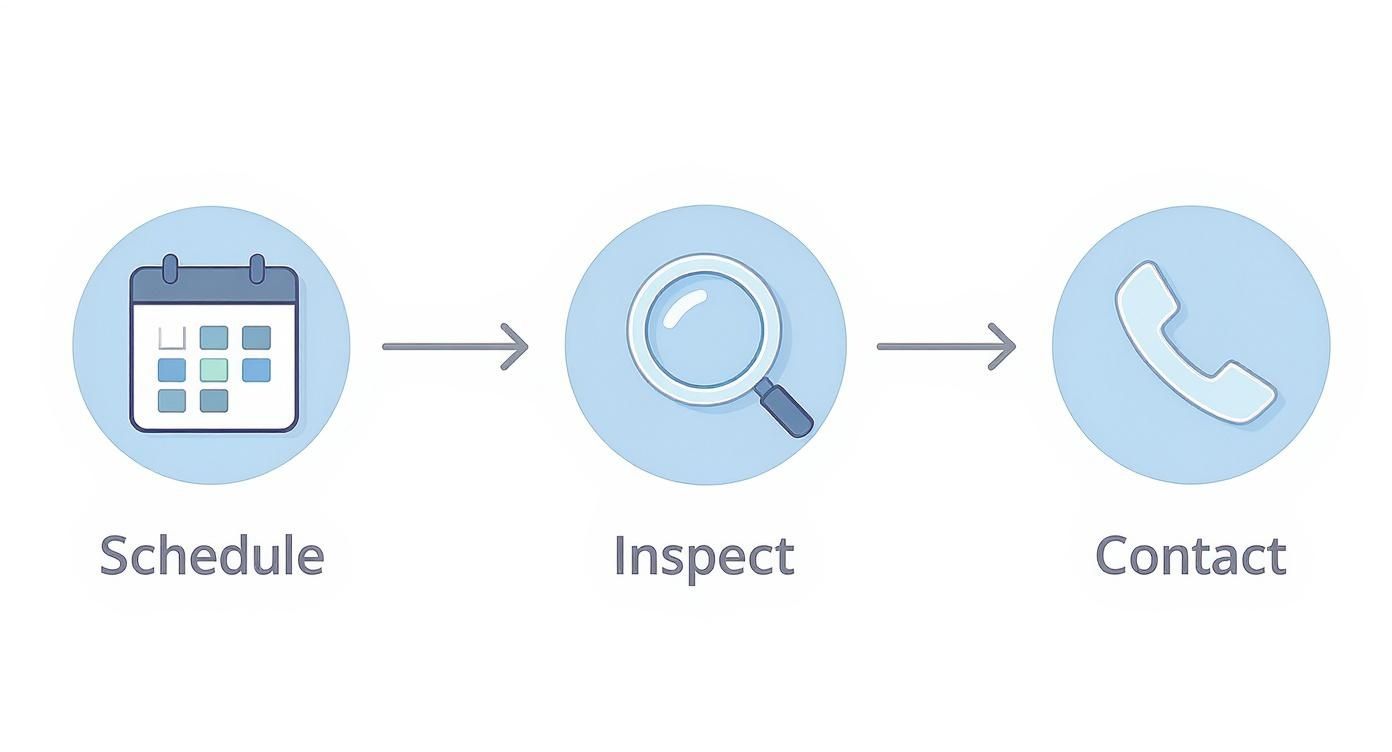
Think of it as your three-step guide to protecting your investment. A structured approach is everything.
Structural and Finishes
First up, let's look at the big picture stuff – the general condition of the property. Your goal here is to compare what you see today with what you saw on your first inspection. If you took photos back then, bring them. They are your best friend and your strongest evidence.
- Walls and Ceilings: Do a slow scan of every room. Look for new cracks, dents, or scuffs that have appeared. Pay special attention to walls where big furniture used to be—that’s a classic spot for removalist damage.
- Flooring: Walk every inch of the property. Are there new stains on the carpet? Fresh chips or cracks in the tiles or floorboards?
- Windows and Doors: This is a bit tedious, but you need to open and close every single window and door. Do they glide smoothly? Do all the locks and latches actually work? Give the glass a quick once-over for any new cracks.
Keep in mind, you're looking for significant changes since you exchanged contracts. A tiny scuff mark might be considered fair wear and tear, but a new, fist-sized hole in the plasterboard definitely isn't.
Plumbing and Wet Areas
Water damage can be a homeowner's worst nightmare, leading to some of the most expensive repairs. So, this part of the check is non-negotiable. Knowing the 8 critical signs of water damage is a huge advantage, as many are easy to miss. Getting this right can save you a fortune.
- Taps and Showerheads: Systematically turn on every tap in the house—kitchen, bathrooms, laundry. Check both hot and cold. Is the water pressure decent? Does the hot water actually get hot? A weak trickle could signal a much bigger problem.
- Toilets: Flush every loo. Make sure it stops running after the cistern refills.
- Drains: Check that every sink, basin, shower, and bath drains properly. If it’s slow, you could be looking at a blockage.
- Visible Leaks: Get down and look under every sink. Check around the base of the toilets. You’re hunting for any sign of an active leak or fresh water stains on the vanity or floor.
Don't be shy about running the hot water for a good minute or two. The seller is required to have all utilities connected for the inspection, and you have every right to confirm the hot water system is doing its job.
Electrical Systems and Appliances
Faulty wiring isn't just an annoyance; it's a serious safety risk. You also need to be sure that all the appliances included in the sale are in the same working condition as when you made your offer.
Here’s a pro tip: grab a cheap power point tester from Bunnings or any hardware store before you go. It’s a small device that plugs into an outlet and instantly tells you if it’s live and wired correctly.
Your Electrical Test Run
- Lights: Go from room to room and flick every single light switch on and off. Don't forget the lights outside, in the garage, or any fancy feature lighting.
- Power Points: This is where your tester comes in. Check every outlet. It's way faster and more reliable than plugging your phone in and out.
- Ceiling Fans and Exhausts: Switch on every fan. Listen for any weird grinding noises and make sure they spin up correctly.
- Air Conditioning: Test both the heating and cooling functions. Let each one run for a few minutes to make sure it's actually pushing out hot and cold air.
Included Appliances and Fittings
Pull out your contract of sale. It will have a list of 'inclusions' or 'chattels' – basically, everything that’s meant to come with the house. Your job is to make sure it's all still there and it all still works.
- Kitchen Appliances: Put the dishwasher on a quick rinse cycle. Turn on the oven, the grill, and every burner on the cooktop. Don't forget the rangehood fan and light.
- Blinds and Curtains: Open and close all the window coverings. Make sure they operate as they should.
- Other Inclusions: If the contract mentions a garage door opener, a security system, or built-in speakers, test them.
Outdoors and External Areas
Don't get so focused on the inside that you forget about the outside. The property needs to be handed over "free of all debris," and that includes the garden and yard.
- Rubbish Removal: Scan the property for any piles of rubbish, old furniture, or leftover building materials. The seller is responsible for removing it.
- Gates and Fences: Check that gates swing freely and latch properly. Look for any new damage to the fences.
- Pool and Spa Equipment: If there's a pool, get the agent to show you the pump and filter in operation.
- Drainage: If it's rained recently, look for any large areas of standing water. It could be a sign of poor drainage.
Nailing this methodical final inspection before settlement gives you peace of mind. It confirms you're getting the property in the condition you expected and paves the way for a smooth, stress-free settlement day.
How to Document Defects and Report Issues
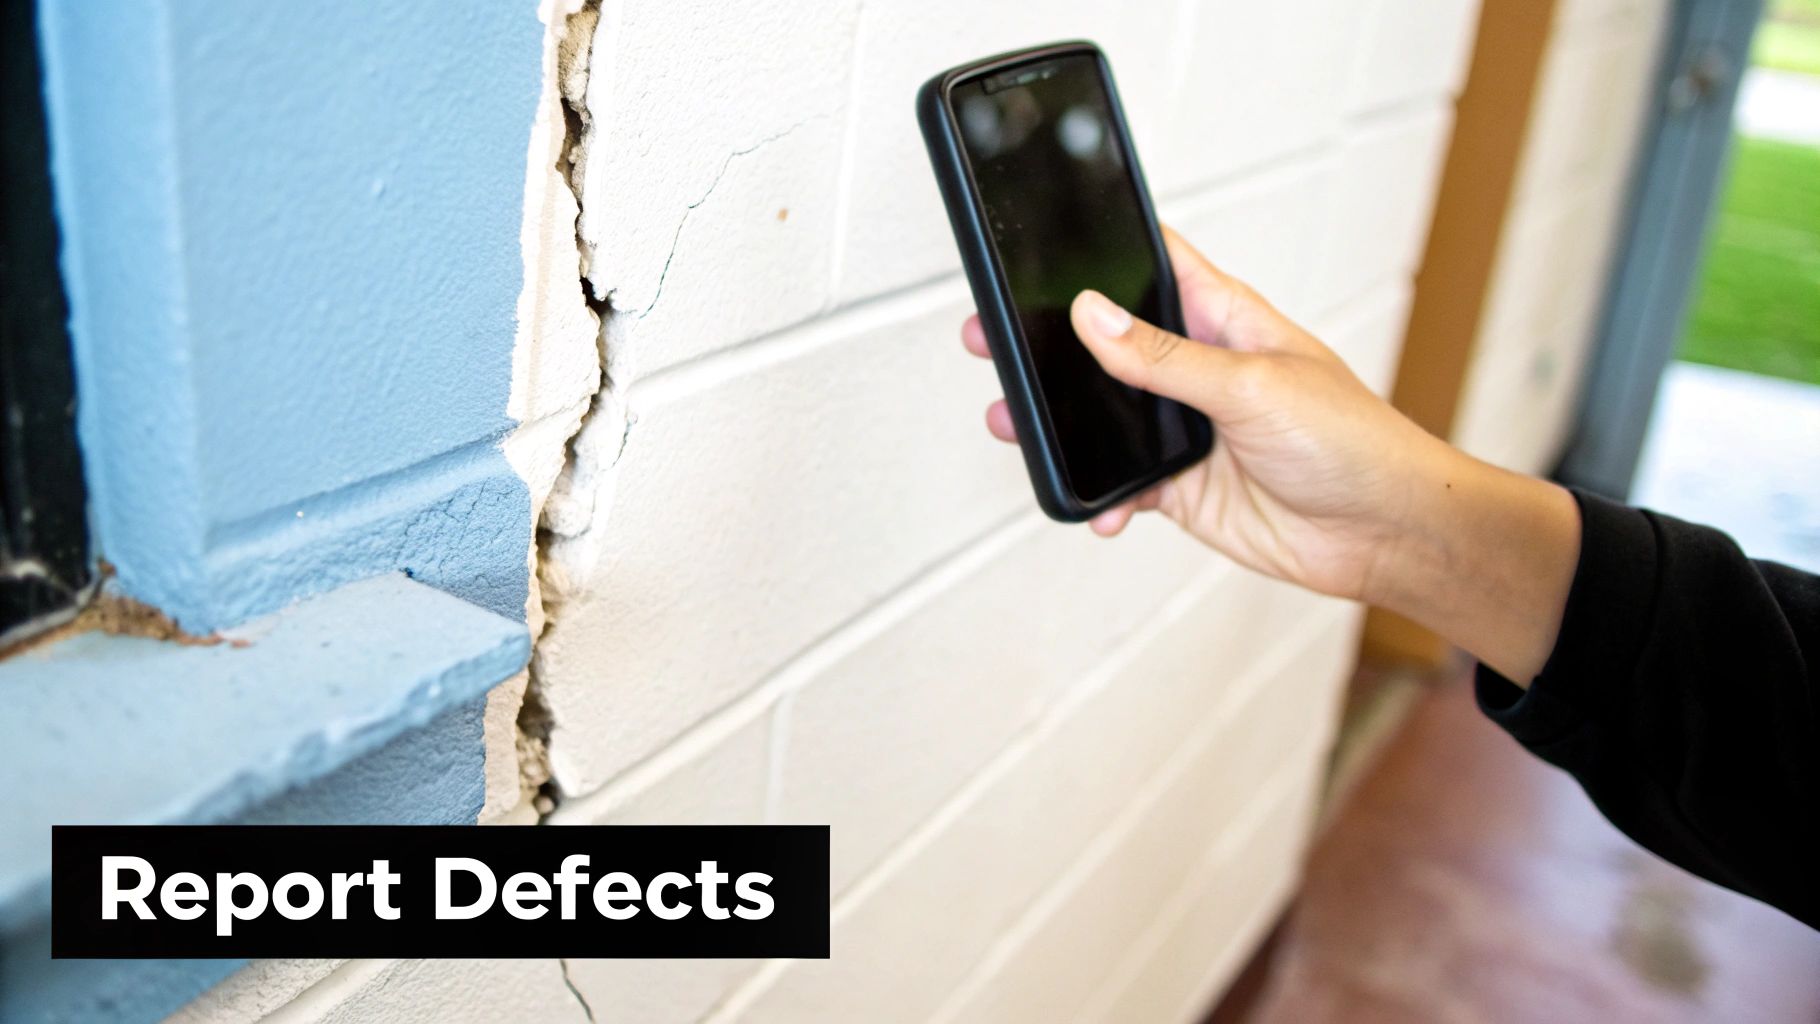
Finding a problem during your pre-settlement inspection is only half the job. The real test is how you document it. Get this right, and you’ll have a smooth resolution; get it wrong, and you could be walking into a last-minute nightmare.
Your phone is your best friend here. We’re not talking about a few hurried notes—we need clear, irrefutable proof. Good documentation isn’t just about taking a quick photo; it’s about building a solid case your solicitor can use to fight for you.
Capturing Undeniable Evidence
Every photo needs to be sharp, well-lit, and tell a story. A blurry, vague picture isn’t going to help anyone and will likely get dismissed. Your goal is to make the issue so obvious it simply can’t be ignored or argued.
For every single problem you find, follow this simple three-shot rule:
- The Wide Shot: Start by taking a photo of the entire room or area. This shows exactly where the defect is located and gives it context.
- The Medium Shot: Now, step a little closer. Frame the defect with its immediate surroundings, like a chip in a tile next to the vanity or a crack beside a window.
- The Close-Up: Get right in there and capture the detail. This is your money shot, highlighting the specifics of the damage or poor workmanship.
If you’re dealing with something that doesn’t work properly—a flickering light, a stiff door handle, or a dripping tap—a short 10-15 second video is infinitely more powerful than a photo. Just make sure you talk through what you’re seeing and doing as you record.
Creating a Simple Defect Report
Resist the urge to just forward a chaotic stream of photos to your solicitor. You need to organise your findings into a clean, simple report. It doesn’t need to be a work of art; a straightforward email or Word document is perfect. For more serious disputes, you might eventually need a formal document like a Scott Schedule, but for now, clarity and organisation are what matter most.
Here’s a basic structure you can use for each issue:
Issue 1: Cracked Window in Master Bedroom
- Location: North-facing window, master bedroom.
- Description: A new horizontal crack approximately 15cm long has appeared in the bottom right corner of the glass. This was not present at the time of contract exchange.
- Evidence: See attached images IMG_001 (wide), IMG_002 (medium), and IMG_003 (close-up).
Do this for every single defect. It keeps everything professional and makes it incredibly easy for your legal team to understand the situation and act fast.
The Golden Rule of Communication
Once your report is ready, there’s one critical step: send it directly to your conveyancer or solicitor. That’s it. Do not, under any circumstances, try to discuss or negotiate defects with the vendor or their real estate agent yourself.
This isn’t about being difficult; it’s about protecting your legal position. All communication absolutely must flow through the proper legal channels. Your solicitor understands the contract and will frame the issue in a way that preserves your rights and pushes for a resolution. Going it alone can seriously complicate things and weaken your position.
Keep your report factual and professional. Stick to the evidence and avoid emotional language. This calm, methodical approach gives your legal team the best chance of negotiating a swift and successful outcome for you in those crucial days before settlement.
Navigating Your Legal Options for Defects in NSW
Finding a major defect during your final inspection can make your heart sink. You're so close to the finish line, and now this. But take a deep breath—it's not a disaster. In NSW, the standard Contract for Sale of Land gives you a solid framework of rights, and it all boils down to one key principle.
The vendor is legally obligated to hand over the property in the same condition it was in when you both signed on the dotted line, fair wear and tear aside.
This is where your power lies. If the hot water system has suddenly packed it in or a removalist has put a fist-sized hole in the living room wall, the seller hasn't held up their end of the bargain. Your first move isn't to get into a heated argument; it's to calmly call your solicitor or conveyancer. They become your voice and your shield.
Your First Steps: Negotiation and Remedies
Once you've flagged the issue, your solicitor will typically send a formal notice to the vendor's legal team. This letter lays out the defect and makes it clear that a solution is required before settlement can proceed. This isn't just a polite request; it's you asserting your contractual rights.
From here, the negotiation usually heads toward one of three common outcomes:
- Fix it Before Settlement: This is the cleanest solution. The vendor agrees to hire a qualified professional to fix the problem at their own cost, all before the settlement date.
- Negotiate a Price Drop: If time is tight or you’d rather manage the repairs yourself, your solicitor can negotiate a reduction in the final purchase price to cover the estimated cost.
- Withhold Funds: A very effective strategy is to agree that a specific amount of money will be held back from the vendor at settlement. These funds are typically kept in a third-party account (like the agent's trust account) and are only released once the repair is completed to your satisfaction.
It’s absolutely critical to remember this: your leverage plummets the second that final payment goes through. Once settlement is done, trying to get a vendor to fix anything becomes an expensive, uphill battle. You have to act decisively before that happens.
When Things Get Complicated
So, what happens if the vendor just digs their heels in and refuses to cooperate? It's rare, but it happens. If you've hit a stalemate and the defect is a serious one, your solicitor might advise you to delay settlement. This is a significant step that puts real pressure on the vendor, who is likely counting on that money for their own next move.
If the problem still isn't resolved, your options expand. This is when you might need to look at bringing in external bodies for help. For these kinds of situations, it pays to be organised. Our NSW building dispute preparation checklist is a great resource for structuring your evidence and approach.
Your main avenues for escalation are:
- NSW Fair Trading: This government body offers mediation services, which can be a fantastic way to find a middle ground without ending up in a formal tribunal. In fact, for many building disputes, it's a mandatory first step.
- NSW Civil and Administrative Tribunal (NCAT): For more serious issues, filing an application with NCAT is the next logical step. The Tribunal has the authority to issue legally binding orders, including compelling the vendor to pay for the necessary repairs.
Australia's massive $11 trillion housing market (as of October 2024) is built on a foundation of rules designed to protect buyers just like you. The legal structures are there for a reason—to make sure your huge investment is a safe one. Getting your head around your legal standing empowers you and your solicitor to make smart, strategic decisions, turning a moment of panic into a clear, manageable process.
Common Questions About the Final Inspection
Even with a detailed checklist in hand, the final inspection can throw up some last-minute curveballs. It’s these grey areas and unexpected problems that cause the most stress right before you get the keys.
Let’s walk through the most common questions we get from buyers, so you know exactly what to do.
What Counts As Fair Wear and Tear?
This is the big one, and the source of many a pre-settlement debate. Fair wear and tear is the minor, everyday deterioration that happens when someone actually lives in a house. It’s not considered damage.
So, what does that look like in practice? A few scuff marks on a hallway wall from moving furniture is a classic example. You might also see faded paint in a room that gets a lot of sun, or minor indentations in the carpet where a heavy sofa has been sitting for years. These things are generally accepted as part of a property's history.
But a big, fresh hole in the wall where a picture was yanked out, a cracked window, or an air conditioning unit that has mysteriously died since you exchanged contracts—that's damage. These are new problems, and the vendor is on the hook to fix them. Your photos from the first viewing are your secret weapon here; they're the proof of the property's "before" condition.
What if the Seller Refuses to Fix a Problem?
You've found a genuine issue, raised it with the agent, and the vendor has just said "no." What now? First, don't get drawn into a heated argument on the spot. It’s time to let the professionals handle it.
Your very next call should be to your conveyancer or solicitor. They'll issue a formal notice to the vendor's legal team, clearly outlining the defect and your contractual rights.
From there, your solicitor has a few powerful cards to play:
- Withholding funds from the settlement amount to cover the cost of repairs.
- Negotiating a price reduction to compensate you for having to deal with it.
- Delaying the settlement date until the vendor makes good on the repair.
The key takeaway? Your bargaining power evaporates the second the money changes hands. It's absolutely critical to get these disputes sorted before settlement is finalised.
The Seller Left a Pile of Rubbish Behind. What Can I Do?
When you sign a contract of sale, the vendor agrees to provide 'vacant possession'. That's a legal term meaning the property has to be completely empty—no people, no old furniture, and no piles of junk—except for the specific items listed as inclusions.
If you turn up for your final inspection and find a mountain of rubbish in the backyard or the garage full of the seller's unwanted belongings, get on the phone to your solicitor immediately. They can formally demand the vendor has it all cleared before settlement.
A really effective strategy here is to negotiate holding back a few thousand dollars of the sale price in a trust account. The money is only released to the vendor once they provide a receipt or proof that the rubbish has been professionally removed. It's amazing how quickly things get cleaned up when there's a financial incentive.
Can I Bring a Tradesperson to the Inspection?
Yes, absolutely—and in some cases, it’s a brilliant move. You just need to arrange it with the real estate agent ahead of time to ensure they can grant access. Having a qualified builder, plumber, or electrician with you can be a game-changer.
This is especially smart if you're buying a brand-new home. An expert's eye can spot compliance issues or shoddy workmanship that you'd likely miss. It's also a great idea if your original building report flagged a few potential issues to keep an eye on. Getting a tradie to give it the final all-clear gives you total peace of mind.
An expert can give you an immediate, on-the-spot assessment of how serious a problem is and a ballpark cost to fix it. That's hard, factual information your solicitor can then use to negotiate a fair and fast solution.
A thorough final inspection before settlement is your best defence, but sometimes you uncover issues that need an expert eye. If you've found defects that need professional assessment or require an NCAT-compliant report to strengthen your position, Awesim Building Consultants can help. We provide the detailed, evidence-based documentation you need to secure a fair outcome. Contact us today for independent, expert advice you can trust.
