
New tiles often look fine at first glance. Then you notice a line that doesn’t sit flush, a grout joint that has already cracked, or a shower tile that sounds hollow when you tap it. Homeowners usually hope it’s minor. Lawyers and strata managers often inherit the same issue later, once water ingress, delamination, or a rectification claim has already escalated.
In NSW, that hesitation can be expensive. Tiling defects are not just a cosmetic annoyance. They often point to failed substrate preparation, poor adhesive coverage, missing movement joints, or waterproofing work that doesn’t comply with the relevant standard. Once those failures are built into the assembly, patching the visible symptom rarely solves the underlying problem.
Awesim Building Consultants works in this space from a practical dispute perspective, with 35+ years in building and construction and 15+ years providing litigation support to homeowners, builders, and lawyers. That matters because defective tiling is usually proved or disproved by methodical inspection, accurate measurements, and clear reporting, not by opinion alone.
Introduction The True Cost of Tiling Defects in NSW
A small defect in a tiled bathroom can become a serious building dispute faster than most owners expect. A few drummy tiles might mean debonding. Cracked grout might mean movement. Efflorescence might mean moisture is travelling where it shouldn’t. By the time the defect is obvious, the rectification scope is often much larger than the area that first drew attention.
That’s one reason tiling defects turn up so often in disputes. In NSW, tiling defects account for approximately 25 to 30% of all reported building rectification claims handled by NCAT, and 72% of these tiling defects stem from workmanship issues, with average rectification costs of AUD 15,000 to 25,000 per claim, according to NSW Fair Trading dispute information.
Why minor tile issues aren’t usually minor
The surface symptom is rarely the whole story. A tile that sounds hollow may have inadequate adhesive contact. A tiled shower that shows staining at the base may have waterproofing failure below the finish. A floor with lippage may reflect poor set-out, poor substrate preparation, or wrong installation technique for the tile selected.
For homeowners, the practical problem is simple. You can see something is wrong, but you can’t tell from the surface alone whether the right fix is localised repair, partial replacement, or full removal and relay.
For lawyers, the problem is different. A viable claim depends on evidence tied to the contract, the Home Building Act 1989 (NSW), and the applicable Australian Standards. A complaint that says “the tiles are bad” won’t carry much weight. A schedule identifying location, defect type, measurement, and non-compliance usually will.
Practical rule: Treat tiled defects as a system failure until inspection proves otherwise. Tile, adhesive, substrate, movement joints, and waterproofing all work together.
Why NSW disputes turn on documentation
In a live dispute, the issue isn’t just whether a defect exists. The issue is whether it can be described precisely enough to support rectification, negotiation, or an NCAT order. That means photos, measurements, room references, sounding results, moisture observations, and links to the relevant standard all matter.
That’s where many owners lose ground early. They wait, accept informal promises, or let rectification works start before the original condition is properly recorded. Once tiles are lifted or regrouted, key evidence can disappear.
Common Tiling Defects and How to Spot Them
Some tiling defects are obvious the moment you walk into the room. Others need a closer look, good light, and a bit of patience. The key is to separate a visible symptom from the probable cause.
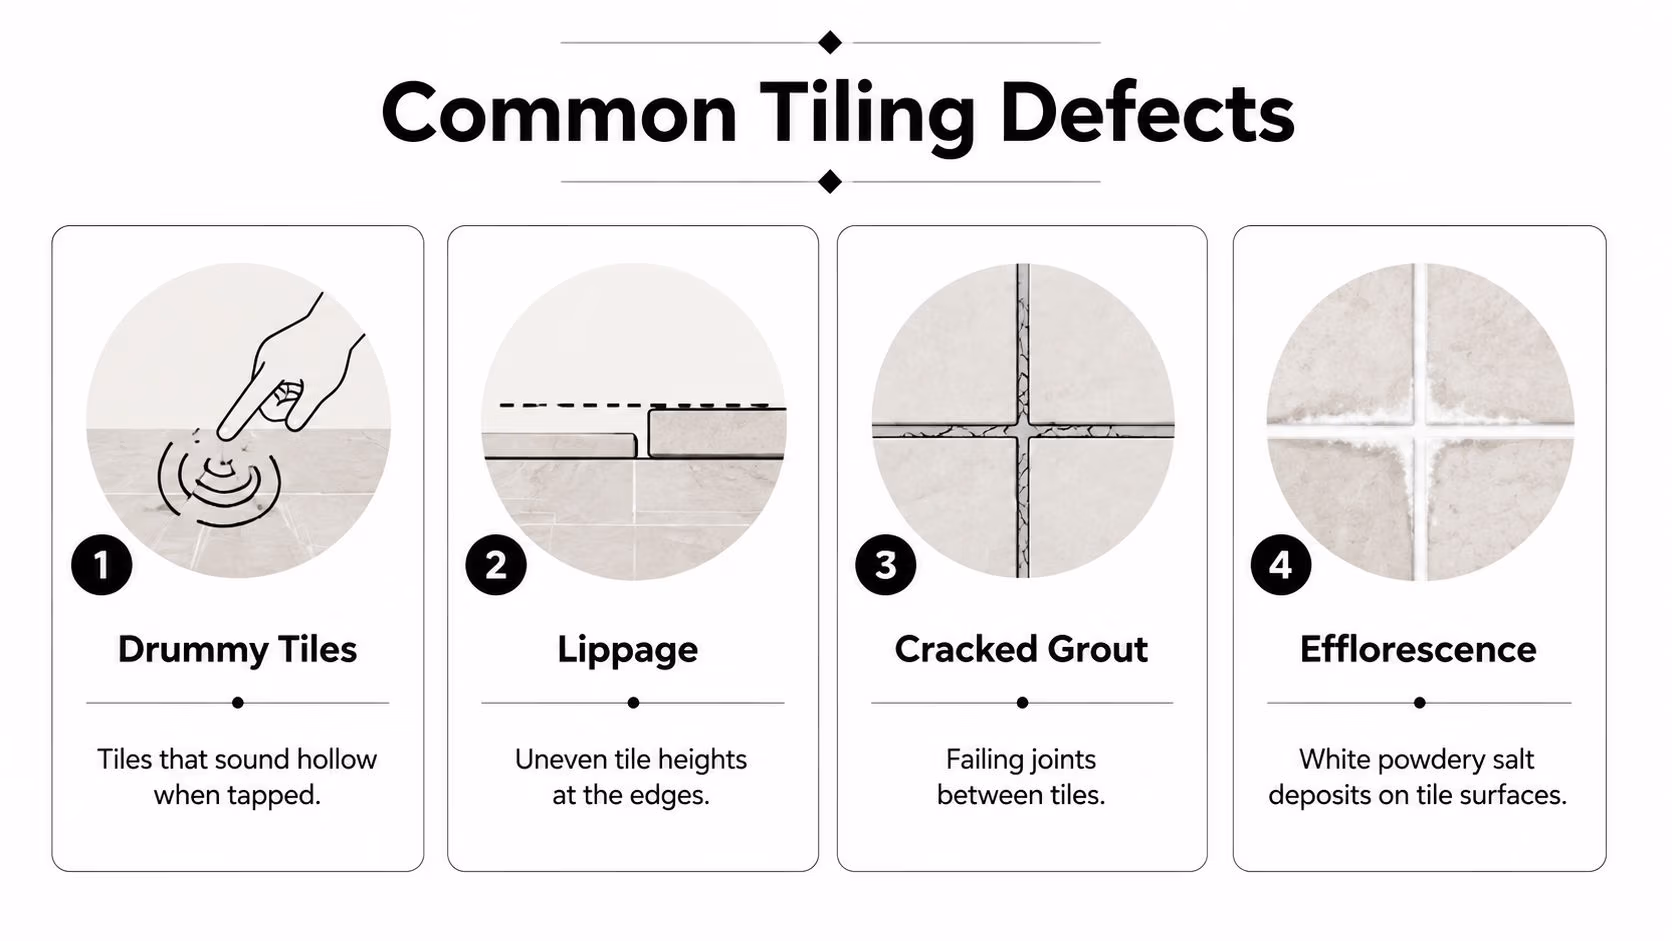
Lippage and uneven tile edges
Lippage is the height difference between adjacent tile edges. Owners usually notice it under raking light, barefoot, or when a mop catches on the edge. In bathrooms, it often shows up along long runs where set-out and bed consistency weren’t controlled well.
A simple check is to slide a rigid card or a metal straightedge across the joint. You’re not trying to perform a formal compliance test at home. You’re trying to confirm whether the unevenness is isolated or repeated across the floor or wall.
Cracked tiles and cracked grout
Cracked grout joints can mean movement, shrinkage, or poor support beneath the tiled surface. Cracked tiles are more serious because they often indicate stress transfer into the tile body itself. That can come from substrate movement, point loading, poor coverage, or missing movement accommodation.
Look for patterns. Random hairline cracks in a single grout joint are different from repeated cracking through tile corners, along doorways, or across a floor line.
Hollow tiles and debonding
Hollow sounding tiles are one of the most common findings in defect work. In Sydney and rural NSW strata properties, hollow-sounding tiles represent 72% of ceramic floor tile failure reports, often linked to deviations from AS 3958.1, including insufficient mortar coverage or missing movement joints at the required 4.5m intervals, as outlined in this technical discussion of ceramic tile system failures.
Try a light tap test with a coin or similar small hard object. A well-bonded tile usually gives a sharper sound. A debonded tile often gives a dull, drummy response. This is only a screening check, not a final diagnosis, but it’s useful for identifying clusters.
A single hollow tile may be a local bond issue. A field of hollow tiles usually points to installation failure.
Efflorescence and staining
Efflorescence appears as a white, powdery deposit. Owners often see it at shower bases, balcony thresholds, or lower wall zones. It’s a sign that moisture is moving through the system and depositing salts as it evaporates.
Wiping it off doesn’t solve anything if the moisture source remains active. In showers, that usually calls for attention to waterproofing, drainage falls, and how the wall-floor junction was built.
What to note before anyone starts repairs
Before a tiler, builder, or handyman touches the area, record:
- The room and exact location of each issue
- Whether the defect is isolated or repeated across the surface
- Any recent water exposure or movement signs such as sticking doors or cracking nearby
- Whether the sound changes from tile to tile during tap testing
Those early notes often become more important than people realise once a dispute starts.
Your Guide to Inspecting and Documenting Tiling Evidence
If a tiling issue may turn into a dispute, your first job is not to fix it. Your first job is to preserve evidence. Good evidence makes expert assessment easier and gives your solicitor, insurer, or tribunal member something concrete to work with.
What to gather before you start
You don’t need specialist equipment to make a useful initial record. You do need consistency.
Use:
- A phone or camera with date settings enabled
- A tape measure or ruler for scale in close-up photos
- A spirit level or straightedge to show unevenness
- A torch to cast low-angle light across lippage or chipped edges
- A notebook or digital note app to log each defect separately
A practical starting point is a room-by-room checklist. A standard house inspection checklist helps keep the record organised and stops defects from being described too loosely.
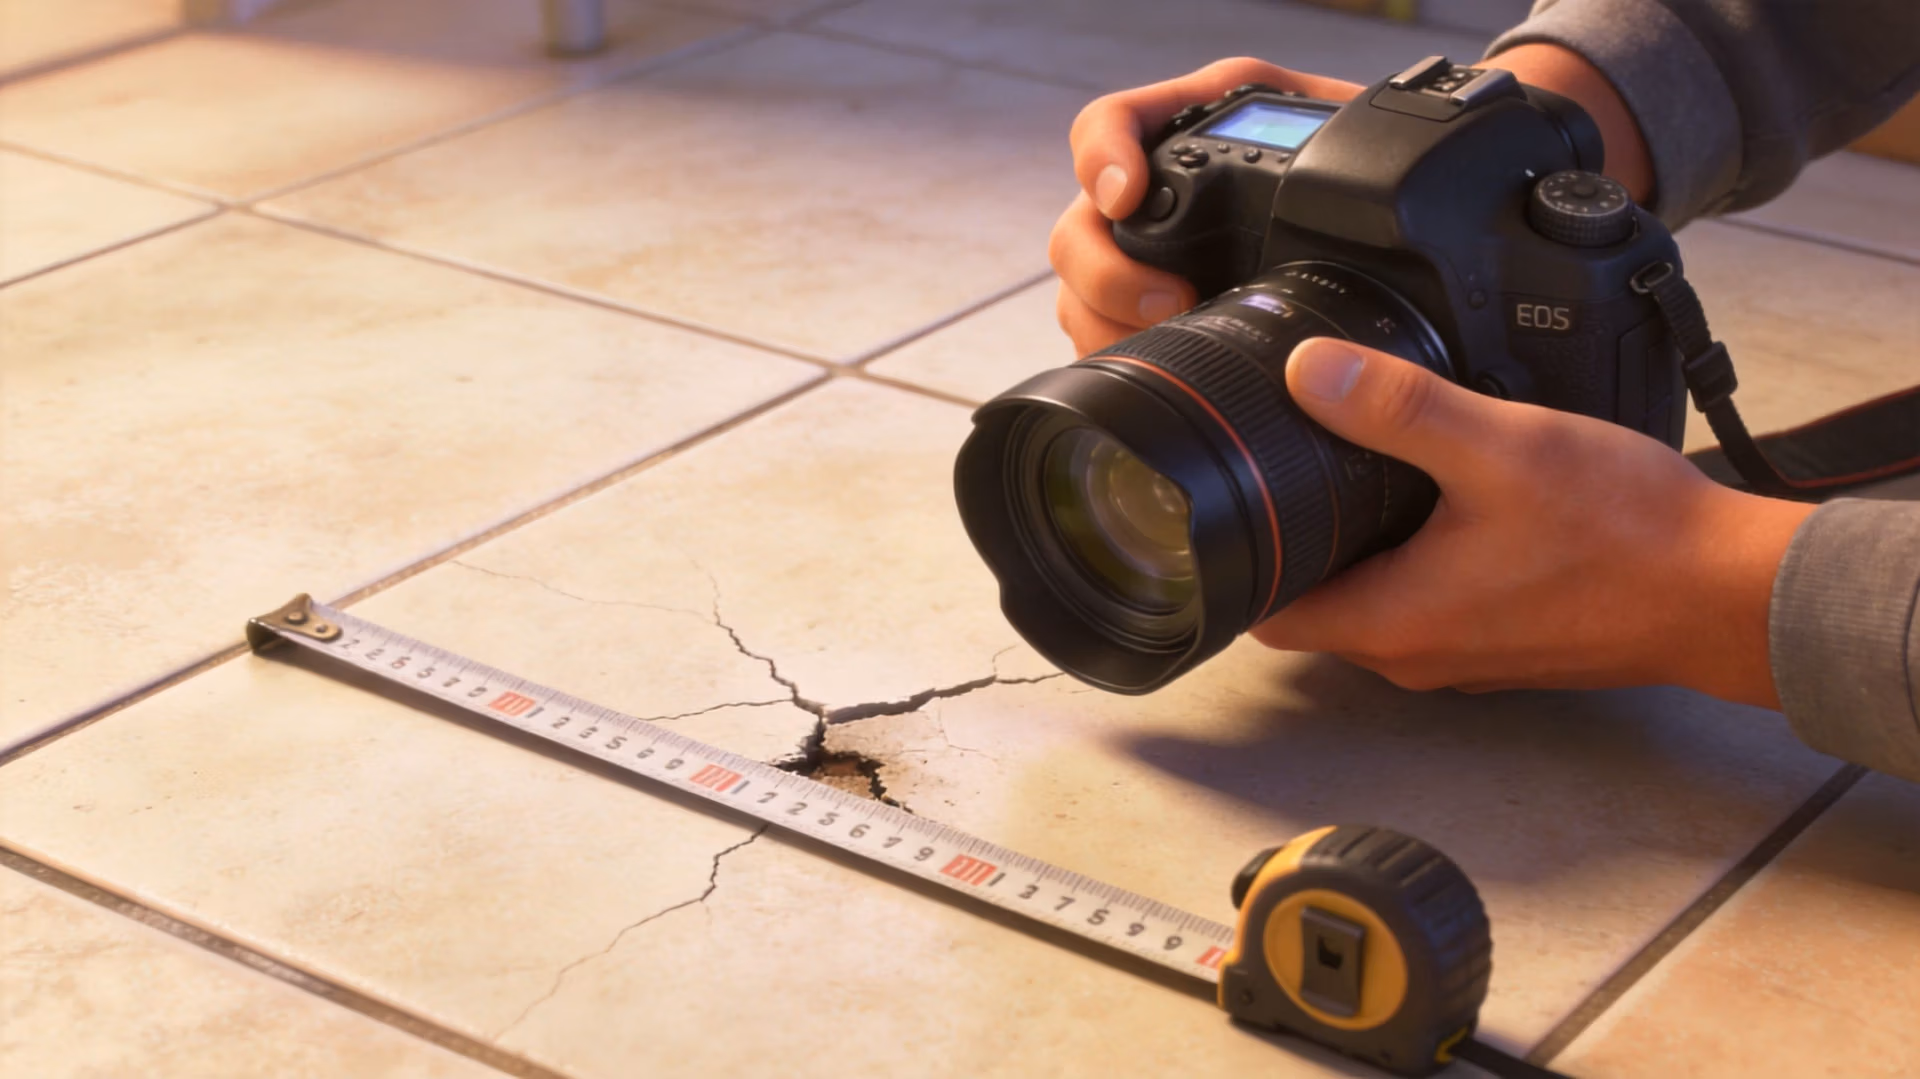
How to photograph defects so the photos are useful
Most owners take photos too close and too early. The result is a gallery of damaged surfaces with no context. That doesn’t help much in a report or application.
Take each set in this order:
- Start wide. Show the whole room or wall so the defect location is obvious.
- Move to a mid-range view. Include nearby fixtures, doorways, waste points, or corners.
- Take a close-up with scale. Put the ruler or tape measure next to the crack, lip, gap, or failed joint.
- Repeat under different light if the issue is surface-level or reflective.
If a tile sounds drummy, make a note of the tile position on a simple sketch. Numbering tiles can be crude but effective. Tribunal work often turns on whether someone can identify the exact affected tile later.
Notes that actually help in a building dispute
A useful note says what, where, and when. It doesn’t try to sound technical unless you know the term is correct.
Good examples include:
- “Main bathroom floor, doorway side, three adjacent tiles sound hollow on tap.”
- “Shower wall, lower left corner, white salt deposit returns after cleaning.”
- “Laundry floor, crack runs through grout line and into tile edge.”
Keep notes factual. Avoid guessing who caused the defect until the inspection evidence is in.
Why this matters for a Scott Schedule
A Scott Schedule is not just a list of complaints. It’s a structured defect document that identifies each item, its location, the alleged non-compliance, and the remedy in dispute. If your initial evidence is disorganised, preparing that schedule becomes slower, more expensive, and less precise.
That’s why clear photos, dated notes, and simple location references matter from day one.
What Causes Tiling Defects Workmanship vs Materials
Most serious tiling defects come back to installation, not the tile itself. That distinction matters because it affects liability, scope of rectification, and whether a local repair has any chance of lasting.
Workmanship failures usually leave a pattern
When a consultant inspects defective tiling, the recurring signs are often consistent across the area. Coverage is poor in more than one location. Jointing is inconsistent. The substrate hasn’t been prepared properly. Waterproofing details are weak at transitions and penetrations.
That aligns with dispute data. Expert analysis indicates 68% of NCAT construction defect disputes involving tiling stem from inadequate waterproofing membrane application or using the wrong tools, and using a 6mm trowel instead of a specified 10mm U-notched trowel can result in void ratios exceeding 20% under tiles, which is a breach of AS 3958.1-2007, as discussed in this tile defect examination reference.
The difference between a bad tile and bad installation
A material defect can happen. A tile can arrive chipped, warped, shade-varied, or inconsistent in calibre. But the failures that end up in disputes more often involve how the material was selected, prepared, and fixed.
Common workmanship causes include:
- Poor substrate preparation. If the base isn’t flat, sound, and ready, the tiled finish inherits the problem.
- Wrong adhesive selection. Tile type, size, and substrate all affect adhesive choice. This overview of tile adhesive types and tips is a useful practical reference for understanding why adhesive selection changes from one application to another.
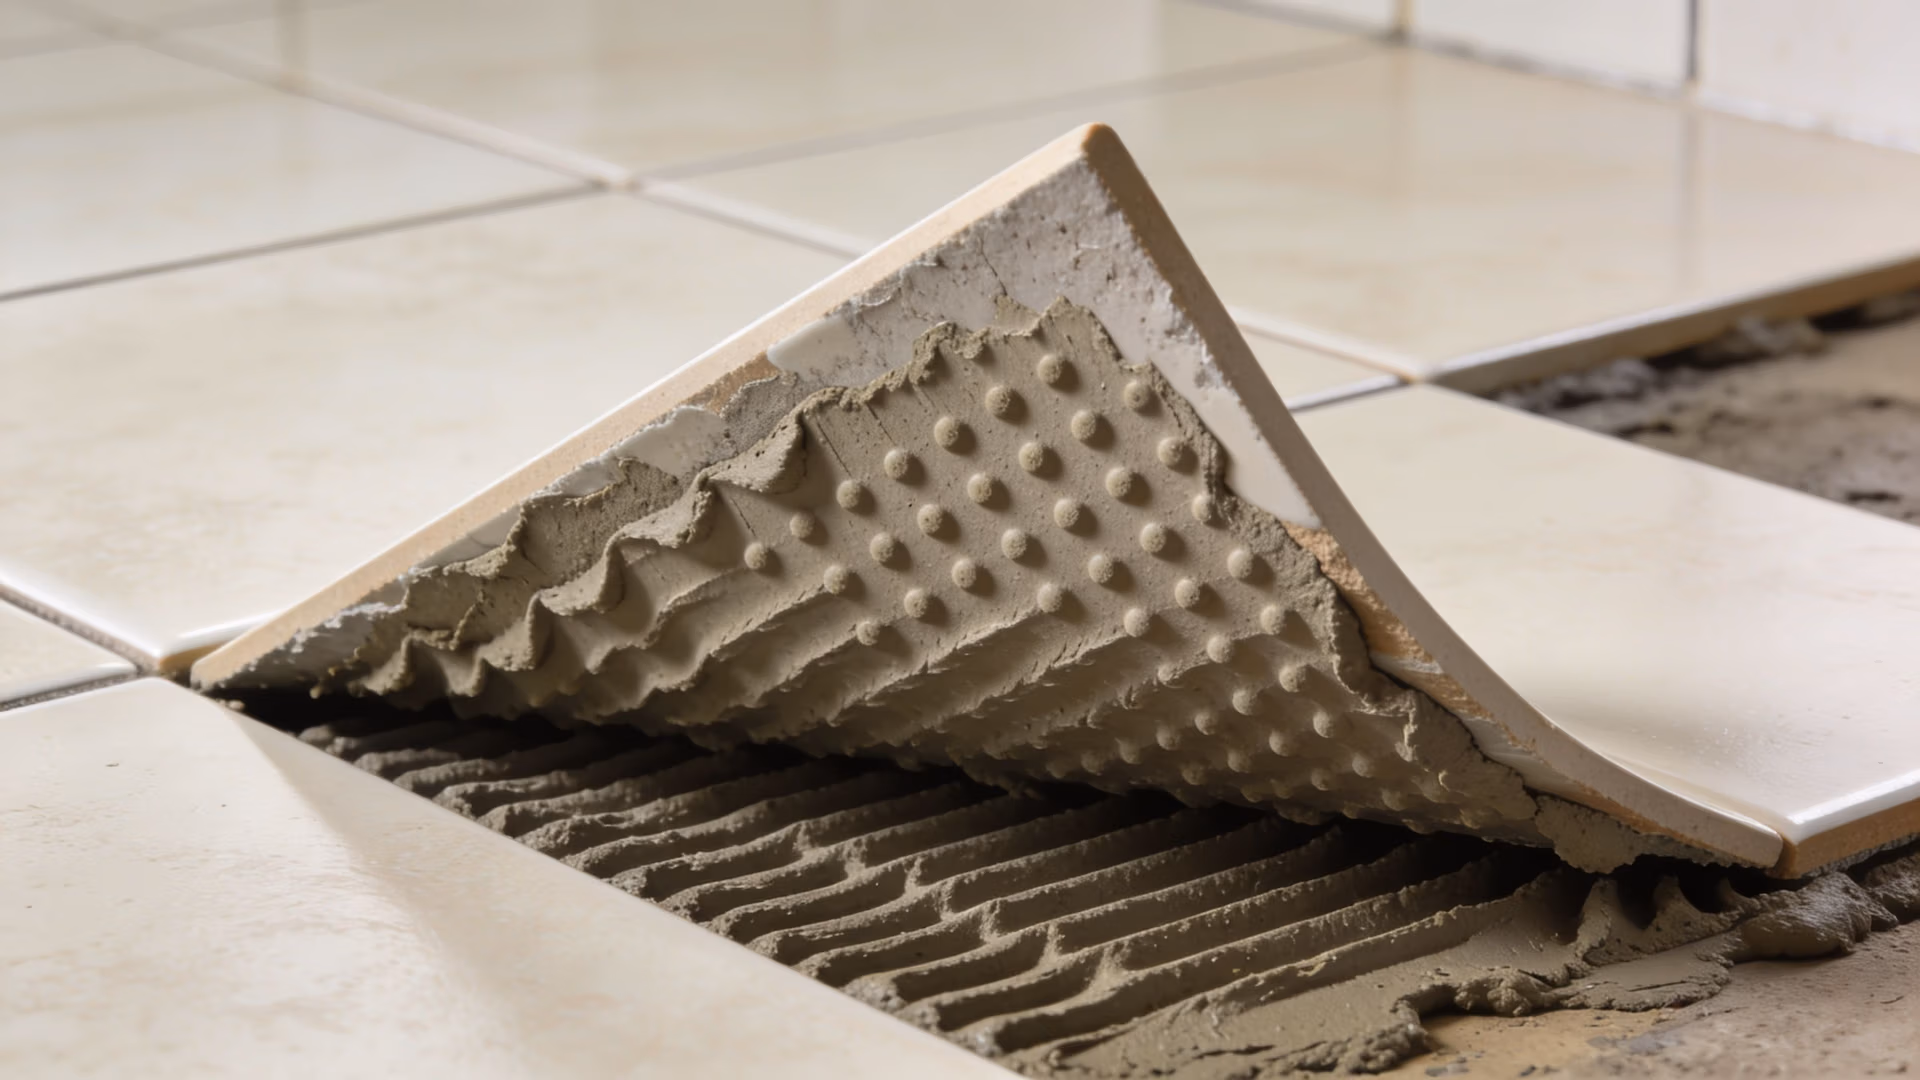
- Insufficient adhesive coverage. Voids under the tile reduce support and increase the chance of drummy sound, cracking, and debonding.
- Missing movement joints. A floor or wall that can’t accommodate movement will often express that stress through cracked grout, tenting, or tile fracture.
Waterproofing and movement are where many jobs fail
Tiling doesn’t make a shower waterproof. The membrane system does. Once that distinction is missed on site, the finish can look acceptable on handover while the assembly is already set up to fail.
The same is true of movement. Tiles are rigid. Buildings are not. Timber shrinks and swells, slabs move, and transitional areas take stress. A tiler who skips movement joints to keep lines clean may create a neater look on day one and a bigger defect claim later.
A short visual reference can help homeowners understand what poor bond and substrate issues look like once tiles are lifted.
Material issues still matter, but they are usually secondary
Material choice can worsen an installation that is already marginal. Large, rectified, or dense porcelain tiles demand tighter control. The larger the unit, the less tolerance there is for substrate variation and poor adhesive technique.
That’s why defect analysis has to look at the whole assembly. Blaming “bad tiles” is often too simplistic. So is blaming only the installer without checking whether the specified system suited the substrate and environment.
If the tile has failed, inspect the system beneath it. Surface appearance rarely tells the full story.
Remediation Options and Estimated Rectification Costs
Once the cause is identified, the next question is practical. Can the tiled area be repaired, or does it need to be removed and rebuilt properly? The answer depends on whether the defect is localised, systemic, or tied to waterproofing failure.
Financially, the stakes are real. A 2019 Insurance Council of Australia report noted that tiling claims constituted 18% of AUD 1.2 billion in domestic building defects payouts, with many claims averaging AUD 20,000 each for rectification, and NSW accounted for 35% of the national total, as noted by the Australian Building Codes Board reference.
Choosing the least disruptive fix isn’t always the cheapest in the long run
Owners understandably look for the smallest repair first. Sometimes that’s sensible. Sometimes it just delays the inevitable.
If a few isolated floor tiles have debonded and the substrate is otherwise sound, localised lifting and replacement may be workable. If the floor sounds hollow across a broad area, or if a shower has membrane failure, partial repair often creates a patchwork result without addressing the underlying cause.
A useful comparison is below.
| Remediation Method | Typical Application | Estimated Cost (per standard bathroom) | Disruption Level |
|---|---|---|---|
| Localised tile replacement | Isolated cracked or loose tiles where surrounding work is sound | Qualitatively lower than full replacement | Low to moderate |
| Regrouting and resealing | Cosmetic grout failure without deeper bond or waterproofing issues | Qualitatively lower than structural remediation | Low |
| Debond repair by injection | Selected hollow tiles where full removal may be avoided | Qualitatively case-dependent | Moderate |
| Partial strip-out and relay | Defects confined to one wall, shower base, or floor zone | Can approach the lower end of common rectification claims | Moderate to high |
| Full bathroom re-tiling | Widespread debonding, poor falls, membrane failure, systemic non-compliance | Often consistent with claim values commonly seen in dispute work | High |
What works and what usually doesn’t
Some repair methods are defensible. Some are cosmetic cover-ups.
Often workable:
- Replacing isolated cracked tiles where spare matching stock exists and the surrounding bond is sound
- Targeted debond remediation where the defect is strictly local and the assembly below is suitable
- Partial demolition where investigation confirms the failure is confined to a defined area
Usually poor value:
- Regrouting a moving floor
- Silicone as a substitute for proper waterproofing
- Tiling over failed work without proving the substrate and membrane are sound
For owners considering overlay options, this external guide to tiling over old shower tile is a helpful background read. In dispute work, though, overlaying is only sensible if the underlying assembly is demonstrably compliant and stable. If the original issue is bond failure, moisture, or movement, tiling over the top usually preserves the defect rather than fixes it.
Rectification needs to match the failure mechanism
An expert report is useful in these situations. The right remedy depends on what failed first. If waterproofing failed, tile replacement alone won’t solve it. If movement joints were omitted, replacing cracked tiles without redesigning the joints usually leads back to the same problem.
Where a matter is heading to formal dispute, owners often need a remedy scope that can stand up to scrutiny. That may include demolition extent, reinstatement method, and references to the relevant standard rather than a general builder’s quote.
Prevention The Best Defence Against Defective Tiling
The cheapest tiling defect is the one that never gets built. Prevention depends less on product marketing and more on decision-making before the first tile is fixed.
What to lock in before work starts
Good contracts and good selections reduce arguments later. If the scope just says “tile bathroom to walls and floor”, there is too much room for assumption.
Make sure the documents deal with:
- The tile type and size being used
- The substrate preparation method
- The waterproofing system and who is responsible for it
- Compliance with the relevant Australian Standards
- How movement joints, set-out, and junctions will be handled
Ask direct questions before work starts. How will falls be achieved? What adhesive is being specified? Who checks the membrane before tiling begins? Vague answers now usually become expensive answers later.
Stage inspections are cheaper than rectification
The best time to identify a tiling problem is before the tiles hide it. A pre-tiling inspection of substrate condition and waterproofing detail can prevent a large part of the defects that later turn into disputes.
That applies especially in wet areas. Owners often focus on tile appearance and overlook the details that determine performance. Even basic maintenance items matter once the job is complete. For a practical homeowner-level reference, this article on caulking for shower is useful for understanding where sealants help and where they are only part of the wider waterproofing picture.
Clean finishes can hide non-compliant work. Inspection has to happen before the surface closes over the defect.
Vet the installer for process, not just price
A cheap quote can still be expensive if the installer can’t explain the system. Ask how they prepare substrates, how they deal with movement joints, and how they coordinate with waterproofing.
A competent tiler or builder should be able to explain the sequence clearly. If they can’t, or if everything sounds improvised, that’s a warning sign.
When to Engage Experts and Pursue NCAT Action
A tiling issue becomes an expert matter when the defect is serious, the builder disputes responsibility, or the proposed repair doesn’t address the underlying failure. At that point, general complaints stop being useful. Evidence has to be organised into a form that NCAT can assess.

Signs it’s time to escalate
You should consider formal expert involvement when:
- The builder denies there is a defect despite repeated visible failure
- Rectification attempts keep failing or only treat the symptom
- The issue involves waterproofing, widespread debonding, or movement
- The cost of repair is substantial enough that evidence quality will affect the outcome
- A solicitor, insurer, owners corporation, or strata manager needs an independent opinion
In those matters, a consultant’s role is not to advocate emotionally. It is to inspect, measure, document, and relate the findings to standards and statutory obligations.
Why expert reports matter in NCAT
The practical reality is that self-run defect claims often struggle on evidence. NCAT data shows homeowner success rates in building disputes average 68%, but this drops to 42% for self-represented parties without an expert witness report, and an NCAT-compliant report structured to meet Australian Standards and the Home Building Act 1989 (NSW) is a critical factor in achieving a successful outcome, according to NCAT publications and statistics.
That doesn’t mean every matter needs a hearing. Many settle earlier once defects are properly scheduled and quantified. But if the matter does proceed, the report must do more than say work is defective. It needs to identify location, defect description, probable cause, relevant standard or duty, and recommended rectification approach.
Scott Schedules and expert evidence
In building litigation, a Scott Schedule brings order to a dispute that would otherwise be a set of competing narratives. Each item is broken down so the tribunal can compare allegation, response, evidence, and remedy.
For parties dealing with multiple tiled areas, repeated defects, or mixed claims involving waterproofing and finishes, a properly prepared Scott Schedule for building disputes is often the clearest way to frame the case.
Awesim Building Consultants provides site investigations, Expert Witness Reports, and Scott Schedules for homeowners, builders, and lawyers dealing with these issues in NSW.
The stronger claim is usually the one with better measurements, better photos, and a clearer defect schedule.
If your matter has already moved beyond a conversation with the builder, don’t wait until evidence is lost or demolition starts. Get the tiled work inspected while the original condition can still be documented properly.
If you’re dealing with tiling defects and need an independent view grounded in Australian Standards and NSW dispute practice, contact Awesim Building Consultants. We assist homeowners, builders, and lawyers with site inspections, Expert Witness Reports, and Scott Schedules. Email admin@awesim.com.au or call 1800 293 746.


