
A lot of owners first contact a consultant at the same point. The slab has been poured, the frame is up, invoices are arriving, and something doesn’t feel right. A wall looks out of plumb. A wet area detail is vague. The builder says it’s normal. The certifier has signed a stage. The owner is left wondering whether they’re being difficult, or whether they’re about to inherit a defect that will cost far more to fix once the house is finished.
That uncertainty is where building disputes usually start.
The home building stages are often presented as a simple sequence from approvals to handover. On site, it’s rarely that neat. Work overlaps. Trades return. Variations change the order. In NSW, the bigger issue often isn’t what stage comes next. It’s whether the stage has been lawfully approved, properly inspected, and recorded in a way that protects you if a dispute later ends up in NCAT.
Awesim’s work sits in that gap between construction and dispute. With 35+ years in building and construction and 15+ years providing litigation support to homeowners, builders and lawyers, the practical lesson is consistent. Most serious defect disputes don’t begin with a dramatic collapse. They begin with ordinary stage failures that were missed, covered up, or never properly documented.
Your Guide to a Successful NSW Home Build
A NSW home build can look orderly on paper and still go off course in a way that only becomes obvious once the next trade has covered the evidence. An owner approves a stage payment, the certifier has attended, and the builder says the job is tracking well. Months later, the same owner is trying to work out whether the waterproofing was ever properly detailed, why the frame tolerances were accepted, or how a variation changed the scope without clear written approval.

That is the gap this guide addresses. Generic stage summaries help with sequence. If you want a broad consumer-friendly overview, RBA Home Plans’ building checklist is a useful starting point. NSW owners also need to know where defects are commonly concealed, what documents should exist before payment is released, and when a disagreement is drifting from site issue to evidence issue.
From an expert witness perspective, the build stages matter because each one creates a record, or a hole in the record. NCAT matters are often decided less by what each party now says happened and more by what can be proved from approvals, photographs, inspection records, emails, variation documents, and the condition of the work before it was covered.
Stages matter because evidence disappears
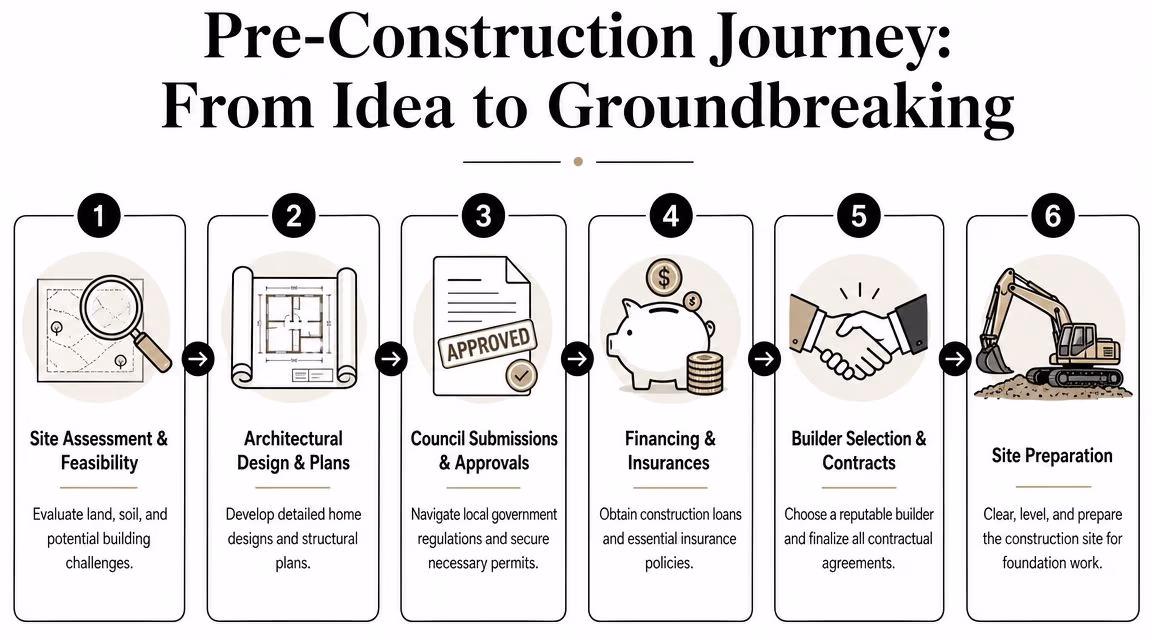
The standard build sequence is familiar. Approvals. Site prep. Foundations. Frame. Lock-up. Services. Linings. Fixing. Completion.
The practical problem is that defects do not stay visible for long.
A poorly compacted base is hidden by the slab. Missing or altered structural details disappear behind framing and cladding. Inadequate service penetrations and wet area preparation are concealed by sheeting, membranes, and tiles. By the time the owner is confident something is wrong, demolition may be the only way to confirm it.
Practical rule: inspect, photograph, and file documents at the end of each stage, before the next trade covers the work.
What to control from the start
Owners reduce dispute risk when they treat each stage as a check point for scope, compliance, and evidence. In practice, that means focusing on:
- Approval status. Confirm what has been approved and whether the work on site matches those documents.
- Contract alignment. Check that the stage claimed for payment matches the contract definition, inclusions, and any signed variations.
- Inspection records. Keep certificates, site photos, consultant reports, engineer details, and written directions in one organised file.
- Communication discipline. Record instructions and concerns in writing, especially where timing, cost, or workmanship is disputed.
Owners who want tighter control during construction often use client-side project management support to track stage inspections, payment triggers, and document flow. That is not about adding bureaucracy. It is about reducing the chance that a preventable defect turns into an argument about memory, scope, or missing records.
A successful build in NSW is not just one that reaches handover. It is one where each stage can be shown to have been approved, inspected, and completed with enough evidence to protect the owner if the relationship with the builder later breaks down.
Stage 1 Pre-Construction Approvals and Site Prep
The first stage isn’t excavation. It’s approval, documentation, and site readiness. If that groundwork is weak, every later stage inherits the problem. In NSW, the approval pathway matters because it dictates what can be built, what documents need to be on hand, and which inspections are required before work can continue.
DA or CDC changes the risk profile
Most home building stages content is written as a neat, linear checklist, but in NSW the primary risk point is often the approval and compliance pathway. NSW planning guidance commonly turns on whether the work is DA-approved or can proceed via a Complying Development Certificate, with different rules and inspection requirements. For owners, the better question isn’t “what stage is next?” It’s “what evidence shows this stage complies?”
A Development Application (DA) usually involves council assessment against planning controls. A Complying Development Certificate (CDC) is a different path, generally used where the proposal can satisfy prescribed standards. The practical difference for an owner is straightforward. If the wrong path has been used, or if the approved documents don’t match what’s being built, the issue doesn’t stay administrative. It becomes a site problem, a certification problem, and often a contract problem.
What should exist before site work starts
Before machinery arrives, the core document set should be complete and consistent. That usually includes:
- Approved plans that match the actual intended build
- Engineering details for structural elements and footing design
- Soil information that informs footing and drainage decisions
- Home building contract documents that align with scope and specifications
- Insurance and certification records needed for the project to lawfully proceed
A common dispute starts with a mismatch between one of those documents and the work on site. The builder may price from one plan set, engineers may issue another, and the owner may approve selections based on a third. Once the slab is down, those inconsistencies become expensive.
Site preparation is not just clearing the block
Good site preparation means more than fencing and scraping off topsoil. Survey set-out, datum levels, access, temporary services, and drainage planning all shape what happens next. If levels are wrong at this point, slab heights, falls, and stormwater outcomes can all be affected.
Keep a dated record of the approved drawings that were actually issued for construction. In a dispute, that single file trail often matters more than a later verbal explanation.
A practical pre-start checklist should include:
- Confirm the approval route and keep the stamped or certified documents.
- Check the survey and set-out against the approved footprint.
- Review engineering before excavation, not after reinforcement is tied.
- Clarify provisional items and variations early so they don’t distort later payment claims.
- Photograph the site before work starts, including boundaries, levels, and adjoining conditions.
Stage 2 Foundation and Concrete Slab
Most structural disputes can be traced back to what happened before the concrete was poured. Owners often focus on visible progress, but the slab stage is where accuracy matters most. If the set-out, excavation, reinforcement, plumbing penetrations, or levels are wrong here, the rest of the house has to work around a mistake that’s already hardened.

Why the slab stage carries so much risk
Before excavation and footing works proceed in Australia, the builder must have the relevant approvals and complete the foundation stage for inspection. This is a critical quality-control gate because errors in footing dimensions, reinforcement, or drainage can lead to structural movement, slab cracking, and other serviceability defects later in the build. This stage is where a small error can create a long argument.
Soil classification and drainage are often underestimated by owners because they’re not visible once the house is complete. Think of the site as a platform that moves differently depending on moisture, ground conditions, and load. If the footing system isn’t built to the engineering and site conditions, the slab may not fail dramatically. It may just move enough to crack finishes, throw frames out, and create recurring complaints that no trade wants to own.
What should be checked before the pour
A proper pre-pour review isn’t just a glance at steel in the trench. It should verify:
- Set-out accuracy so walls, openings, and boundary clearances land where they should
- Excavation depth and profile to match engineering intent
- Reinforcement placement and cover before concrete hides it
- Service penetrations so plumbing doesn’t end up clashing with later framing or fixtures
- Site drainage and moisture control around the slab area
The expensive part of slab defects isn’t only repair. It’s diagnosis. Once the house is built, parties start arguing over whether cracking came from movement, workmanship, moisture, or normal settlement. That argument is harder to resolve if nobody kept clear records before the pour.
Common slab-stage defects that later show up elsewhere
The defects seen later in kitchens, bathrooms, skirtings, and doors often started here.
| Slab-stage issue | Later symptom on the build | Why it matters |
|---|---|---|
| Incorrect levels | Uneven floors, tiling problems, joinery gaps | Finishes reveal underlying inaccuracy |
| Poor drainage planning | Dampness, water ponding, edge moisture issues | Moisture affects performance over time |
| Reinforcement or footing errors | Cracking and movement complaints | Structural response may continue after handover |
| Poor service placement | Rework to plumbing or cabinetry | Trades start cutting or compromising later work |
This walkthrough is worth watching before a pour because it shows the sort of details owners should ask about on site.
A slab should never be treated as a routine pour. It is the last moment when several critical defects are still easy to correct.
Stage 3 Framing Roofing and Lock-Up
A common dispute starts here. The owner walks through the site after the frame goes up, can already picture the rooms, and assumes the hard structural questions have been settled. Then months later the complaints begin. Doors do not clear properly, cornices show uneven lines, roof planes look off from the street, and the argument becomes whether the problem started in the slab, the frame, or a rushed lock-up.
That argument is much easier to avoid than to win.
What framing should achieve
The frame carries loads, sets room dimensions, fixes opening sizes, and establishes the lines every later trade will follow. Whether it is timber or steel, it needs to match the approved plans, engineering details, and manufacturer requirements. It also needs to be plumb, level, and square within tolerances that do not create visible problems once cladding, windows, cabinetry, and plasterboard go on.
In NSW, this is one of the last stages where several structural and dimensional defects can still be seen without destructive work. Once wraps, cladding, insulation, and linings cover the structure, the discussion often shifts from inspection to inference. That is a poor position for any owner preparing for a payment dispute or, later, an NCAT claim.
What lock-up really means
Lock-up is a contract and payment milestone, not a certificate that the hidden work is sound. In practice, it usually means the building has reached a weather-resistant and secure state, with the roof on, external wall systems advanced, and doors and windows installed or close to installed.
The risk is timing. Owners often receive a lock-up claim when the building finally looks substantial, which creates pressure to approve the stage quickly. If there are unresolved framing issues, the cost of checking them rises sharply once external finishes and internal linings start concealing the evidence.
The defects that commonly lead to later disputes
Frame-stage disputes rarely come from one spectacular failure. They usually come from a collection of smaller departures that combine into visible and expensive symptoms later.
- Out-of-plumb or out-of-square framing that leads to crooked wall lines, difficult skirting and cornice set-out, and joinery gaps
- Incorrect truss, beam, or lintel installation that affects load paths, roof geometry, ceiling movement, or cracking
- Missing, altered, or poorly fixed bracing where site changes were made without reference back to the engineering
- Openings built to the wrong size or location so windows and doors need excessive packing, trimming, or forced adjustment
- Tie-down and connection issues at straps, brackets, bolts, and fixings, especially where inspection access becomes limited after wrap or cladding
- Early weatherproofing errors at flashings, valleys, penetrations, sills, and roof-to-wall junctions that later present as leaks but began as detailing failures at lock-up
I often tell clients to look at consequence, not appearance alone. A wall that looks only slightly out can still affect waterproofing, glazing, cabinetry, and door operation across multiple trades. By the time those symptoms show up, each contractor has a reason to blame the one before.
If the frame looks wrong before lining, record it then. After lining, the same defect becomes a debate about whether the finish is crooked or the structure behind it.
A proper inspection at this stage should compare the built work against the plans and engineering, check line and level, review bracing and load-bearing members, look closely at roof framing and tie-downs, and inspect the interfaces where windows, roofing, sarking, flashings, and wall systems are supposed to keep water out. That is the practical checkpoint. It is also the point where clear photos, dated notes, and marked-up plans can make the difference between a straightforward correction and a weak brief in NCAT.
Stage 4 Rough-In and Internal Linings
Once the building shell is closed, the project moves to the least visible but most consequential part of the home. Plumbing, electrical work, data cabling, mechanical services, and insulation are installed inside walls and ceilings. This phase establishes the house’s working systems. Hidden defects also grow expensive then, as the next trade prepares to cover everything with plasterboard.
Why rough-in defects are so hard to unwind
Rough-in work sits behind finished surfaces, so the opportunity to inspect it is brief. A poorly located waste pipe may not become obvious until cabinetry is installed. A damaged cable might not be discovered until fit-off. Missing insulation may only be noticed when rooms perform badly in use. By then, access is destructive and arguments start about who caused what.
This stage needs more than a quick walkthrough. It needs the plans on hand, the service layouts understood, and enough attention to notice when one trade has forced another to compromise. That happens regularly. A duct changes path, an electrician shifts a run, or a plumber cuts around framing in a way that affects both compliance and future access.
The main hidden-risk areas
A useful way to look at rough-in is by consequence, not trade.
| Hidden element | If installed poorly | Likely dispute later |
|---|---|---|
| Plumbing rough-in | Leaks, drainage issues, inaccessible connections | Water damage, rectification access |
| Electrical rough-in | Safety concerns, poor fixture locations, rework | Compliance and usability complaints |
| Mechanical services | Noise, poor airflow, clashing with framing or ceiling setout | Performance disputes |
| Insulation | Thermal discomfort and patchy installation | Quality and specification arguments |
The pre-lining inspection is the key checkpoint. Owners should be looking for whether services are installed where the plans require, whether penetrations are neat and properly coordinated, and whether anything has obviously been damaged or left unsupported.
What tends to go wrong before plasterboard
Several recurring issues lead to later conflict:
- Wet area service penetrations that aren’t carefully prepared for later waterproofing
- Overcrowded wall cavities where plumbing and electrical work compete for the same space
- Missing noggings or backing for future fixtures and joinery
- Insulation installed poorly or inconsistently
- Unauthorised changes made on site without updated documentation
The practical discipline here is simple. Photograph every room before lining goes on. Photograph wet areas in detail. Photograph service runs, penetration points, and any item that may later need to be located behind a wall. Those records can save a great deal of guesswork if a leak, fault, or compliance dispute surfaces after completion.
Stage 5 Fixing Fit-Out and Finishes
This is the stage owners usually care about most because it’s finally visible. Doors are hung. Skirtings and architraves go on. Cabinetry appears. Tiles, tapware, lights, appliances, and paint make the house feel close to complete. It’s also the stage where underlying defects stop being abstract and start showing up in plain sight.
A finish defect is often not just a finish defect. A tile lip can reflect slab or substrate issues. A crooked cornice line can reflect framing movement or poor setting out. Joinery gaps may point to walls that were never straight enough in the first place. If you only look at cosmetics, you can miss the root cause and end up accepting a patch instead of a proper fix.
What fixing stage workmanship should tell you
The fixing stage acts like a report card for the earlier home building stages. Good underlying work usually produces clean, consistent finishes without trades having to force components into place. Poor underlying work leads to shimming, trimming, overfilling, excessive sealant, and “that’s within tolerance” conversations.
Review this stage slowly, not casually. Open and close doors. Look along tile lines. Check cabinetry against adjacent walls. Inspect paint in natural light where possible. Water test operation of fixtures once fit-off permits it. In wet areas, ask not only whether the tile looks neat, but whether the substrate, falls, and interfaces were done correctly before the surface finish was applied.
A practical owner review list
Focus on the areas that commonly generate disputes:
- Waterproofing interfaces. In bathrooms, laundries, balconies and similar areas, neat finishes don’t prove the waterproofing was correct underneath. If there’s any uncertainty, deal with it before completion.
- Cabinetry and joinery alignment. Check for consistent gaps, level benchtops, properly aligned doors and drawers, and clean junctions to walls and floors.
- Floor finishes. Uneven substrates, poor transitions, and movement issues often become obvious here. If you’re still selecting materials, this guide to selecting new flooring is useful because it frames the decision around use, durability, and installation conditions rather than appearance alone.
- Paint and plaster finish. Look for ridging, cracking, visible joints, poor sanding, and inconsistent cut lines.
- Fixtures and fit-off. Test operation, placement, damage, and completeness, not just whether the item has been installed.
Don’t let cosmetic explanations hide structural or moisture issues
Disputes often harden. A builder may characterise an issue as minor, while the owner sees a pattern. Both may be partly right. The visible defect might be minor in itself, but it can still be evidence of a larger problem underneath.
A finish is the final expression of everything that happened before it. If several finishes are failing in different rooms, look backward, not just at the painter, tiler, or cabinetmaker.
Keep your defect list precise. Identify location, item, symptom, and why it matters. “Bathroom wall bad” is useless. “Ensuite shower wall out of plane affecting tile alignment and junction to screen” is far more effective. Specificity shortens arguments.
Stage 6 Completion Handover and Defects Period
Completion is where many owners relax too early. The house looks finished, the builder wants final payment, and everyone is tired of the process. Legally and practically, this is the point where you need the sharpest attention. If you accept handover without understanding what has or hasn’t been completed, you can lose your bargaining power while still inheriting unresolved defects.
Practical completion is a legal and evidentiary moment
Practical Completion doesn’t just mean the house appears done. It generally turns on whether the home is fit for occupation and whether only minor omissions or defects remain. That distinction matters because final payment, possession, and the next phase of the contractual relationship may depend on it.
An owner should never assume that a builder’s notice of completion settles the question. You need to compare the completed work against the contract, approved documents, and actual site condition. Missing certificates, incomplete items, or significant defects can all affect whether handover is appropriate.
Why an independent pre-handover inspection matters
A professional handover inspection gives you a structured defect list before the final handover position hardens. That is often the best time to identify incomplete works, non-compliant details, and workmanship defects while contractors still have access and responsibility is easier to assign.
A focused practical completion inspection can help document defects, incomplete items, and handover issues in a way that is more useful than an informal owner punch list. That matters if the discussion later shifts from cooperative rectification to formal dispute.
What should change hands at completion
Handover should involve more than keys. Owners should expect the close-out package to include the essential certificates and records for occupation and future reference.
A practical completion review should account for:
- Occupation Certificate and relevant approval sign-offs
- Warranties, manuals, and certificates for installed systems and products
- Final defect list or outstanding items list agreed in writing where possible
- Evidence of rectification commitments if anything is to be completed after occupation
The defects period is not a substitute for proper handover
Some owners assume they can sort everything out after moving in because there’s a defects liability period. That’s risky. Minor issues may be easier to address after occupation, but serious unresolved defects become harder to manage once you’ve paid, moved furniture in, and normal use begins.
Use the defects period to pick up issues that emerge in operation, not as an excuse to skip a proper completion review. Keep communications in writing, identify each issue clearly, and attach photos where relevant. If the builder disputes whether something is defective, the quality of your evidence will shape what happens next.
FAQs When Building Disputes Arise
Disputes rarely arrive all at once. More often, they build through unanswered emails, rejected defect lists, delayed rectification, contested progress claims, or pressure to sign off on a stage you’re not comfortable with. When that starts happening, the question changes from “what should the builder do?” to “what evidence do I need if this goes further?”
When should you prepare for NCAT
Prepare early if the dispute is no longer being resolved by ordinary site communication. Warning signs include repeated denials without technical explanation, defects being patched without addressing the cause, refusal to provide records, or pressure to make payment while defects remain contested.
You don’t need to wait until proceedings are filed to organise evidence. In many matters, the strongest work is done before NCAT begins.
What documents matter most
Start with the core record set:
- Contract documents and specifications
- Approved plans and engineer details
- Progress claims and payment records
- Emails, texts, and variation documents
- Site photos organised by date and stage
- Inspection reports, certificates, and defect lists
If you can’t show when a defect became visible, what stage covered it, and what document governed that work, your position becomes harder to prove.
What is a Scott Schedule and when is it useful
A Scott Schedule is a structured way to set out disputed items. It usually identifies the defect or issue, location, parties’ competing positions, and the relief or rectification claimed. It’s useful when the dispute contains multiple defects across several rooms or trade areas and everyone is arguing in circles.
For larger residential disputes, a Scott Schedule forces clarity. It stops vague allegations and makes each item answerable.
When should you get an expert report
If the issue involves causation, compliance, scope of rectification, or whether work meets the contract and applicable standards, independent expert input becomes valuable. That’s especially true where defects are concealed, technical, or already disputed.
One option in NSW is Awesim Building Consultants, which prepares site investigations, expert witness reports, and Scott Schedules for homeowners, builders, and solicitors dealing with residential building disputes. The practical value is in documenting the defect properly, linking it to the relevant evidence, and setting out the issue in a format that can be used in negotiation or proceedings.
Dispute resolution pathway
| Step | Action | Expert Involvement |
|---|---|---|
| 1 | Identify each disputed item clearly | Initial defect review can help separate symptoms from root causes |
| 2 | Gather contract, plans, photos, and communications | Expert can identify missing records that matter |
| 3 | Notify the other party in writing | Technical wording may be informed by inspection findings |
| 4 | Obtain an independent inspection where needed | Expert assesses workmanship, compliance, and likely cause |
| 5 | Prepare a defect list or Scott Schedule | Expert can structure issues item by item for dispute use |
| 6 | Use the material in negotiation, complaint processes, or NCAT | Expert report may support formal proceedings |
The strongest dispute position is usually the one that is most organised, most specific, and least exaggerated. Stick to observable facts, document each stage, and get technical advice before assumptions turn into entrenched positions.
If you’re dealing with defects, handover concerns, or a dispute that may end up in NCAT, Awesim Building Consultants can assist with site investigations, Expert Witness Reports, and Scott Schedules across NSW. For practical assistance, email admin@awesim.com.au or call 1800 293 746.


