
Water Damage in Homes: How to Track Down the Source
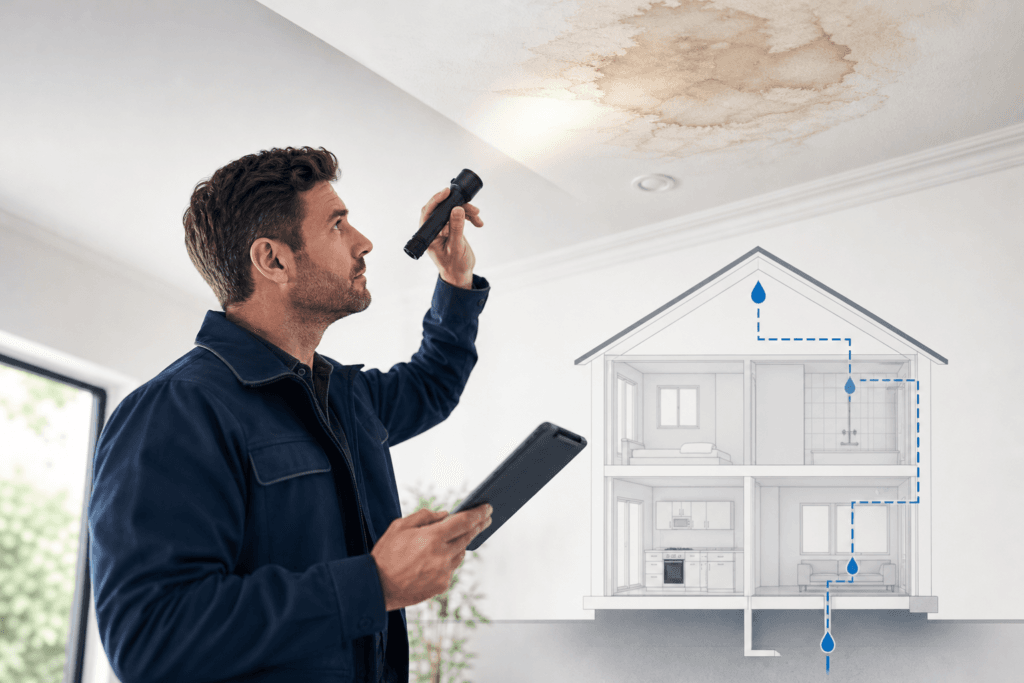
Water damage in a home rarely announces itself at the source. A stain on the ceiling, a musty smell in a room, or a skirting board that has started to swell are the visible results of moisture that has already been travelling through the building fabric for some time. Work backward from those signs using your water meter, a toilet dye test, and a room-by-room inspection of appliances, pipes, and outdoor areas. Systematic documentation of every finding protects you if an insurance or legal claim follows.
By the time a stain or warped skirting board appears, the moisture has usually been present for some time. Identifying the exact source before calling a tradesperson or insurer saves you from guesswork, prevents unnecessary repair costs, and gives you a clear record if a dispute arises later.
This guide walks you through the detection process in the order it should happen: recognise the signs, trace the source, understand what you are dealing with, and document it properly.
How Can You Tell If You Have Water Damage?
Water damage rarely announces itself clearly. More often, it leaves indirect evidence that accumulates quietly until something is obviously wrong.
The most common visual indicators include:
- Ceiling stains and discolouration: Yellow or brown rings on plaster or gyprock often indicate water pooling above, whether from a roof leak, a failed pipe joint, or an overflowing fixture on the floor above.
- Peeling or bubbling paint: Paint lifts when moisture migrates through the substrate behind it. This is particularly common on bathroom walls and ceilings where waterproofing has failed.
- Warped or swollen timber: Skirting boards, door jambs, and timber flooring absorb moisture and deform. A door that suddenly sticks may be the first sign of a slow leak nearby.
- Efflorescence on masonry: White crystalline deposits on brickwork or concrete indicate water moving through the material and depositing salts on the surface.
- Soft or spongy flooring: Tiles that flex underfoot, or floor coverings that feel uneven, can indicate water damage to the substrate beneath.
- Musty or damp odours: Mould growth produces a distinctive smell before it becomes visible. A persistent musty odour in a room with no obvious source is worth investigating.
If you recognise two or more of the indicators above in the same area of your home, that is a reasonable basis to begin a systematic investigation.
Step-by-Step: How to Find the Source of Water Damage
The most common mistake is starting the search at the most visible damage. Moisture travels. The stain on your ceiling may originate from a pipe joint two metres away, or from a roof penetration on the other side of the building. Work through the following steps in order.
Monitor your utility bills for sudden spikes in usage. A sharp increase in your water bill without a change in household habits is one of the earliest indicators of a concealed leak. Pull the last three to six months of bills and look for any unexplained increase. [S1]
Check your water meter while all water is shut off. Turn off every tap, appliance, and fixture in the home. Note the meter reading, then wait 15 to 30 minutes without using any water. If the meter has moved, water is escaping somewhere in the system. The US EPA estimates that 13.7% of all water used in residential settings is lost to plumbing leaks, which means a running meter with everything shut off is a reliable indicator of a problem. [S2]
Perform a dye test on each toilet. Add several drops of food colouring to the toilet tank and wait 15 minutes without flushing. If colour appears in the bowl, the flapper valve is leaking, silently sending water down the drain. Faulty toilets are among the most common sources of concealed water loss in residential properties. [S3]
Follow visible moisture trails backward to their origin. Moisture migrates along the path of least resistance, which is usually downward and toward the nearest structural gap. Start at the lowest visible sign of damage and trace upward and outward. A stain at the base of a wall, for example, may lead back to a failed grout line in the shower above. [S4]
Inspect walls, ceilings, and floors for abnormalities. Press gently on suspect areas. Soft plaster, hollow-sounding tiles, and discoloured grout lines all indicate moisture behind the surface. Pay close attention to areas near wet areas such as bathrooms, laundries, and kitchens. [S5]
Check outdoor areas for unusual ground conditions. Unusually green or lush patches of lawn, soil depressions, or persistently damp ground near the building perimeter can indicate a subsurface pipe leak. These are easy to miss because the damage is occurring underground. [S6]
Inspect appliances and fixtures within 3 metres of the suspected damage. Washing machine hoses, dishwasher connections, hot water systems, and HVAC condensate lines are frequent sources. A crack as small as 1/8 inch in a pipe can release up to 250 gallons of water in a single day, so even a minor fault in an appliance connection warrants close attention. [S7]
For ongoing monitoring, whole-house leak protection systems use flow-based technology to detect unusual water usage patterns and shut off the main supply automatically when a leak is identified. Some insurers offer reduced premiums for homes fitted with these systems, which makes them worth considering after a leak event.
What Are the Three Categories of Water Damage?
Not all water damage carries the same risk. The source of the water determines how hazardous the situation is and what remediation approach is appropriate. Professionals classify water damage into three categories.
The table below summarises each category and its practical implications.
| Category | Source | Health Risk | Typical Response |
|---|---|---|---|
| Category 1 (Clean Water) | Burst supply pipes, overflowing sinks, rainwater ingress | Low | Standard drying and repair |
| Category 2 (Grey Water) | Washing machine discharge, dishwasher overflow, shower drainage | Moderate | Protective equipment, disinfection, drying |
| Category 3 (Black Water) | Sewage backup, rising floodwater, long-standing stagnant water | High | Professional remediation, full PPE, possible demolition of affected materials |
Category 1 water comes from a clean supply source and poses minimal health risk if addressed promptly. The main concern is structural: water left in wall cavities or under flooring will cause timber decay, corrosion, and eventually mould growth regardless of how clean the source was.
Category 2 water contains biological or chemical contaminants at levels that can cause illness on contact. Direct handling without protective equipment is not advisable, and affected materials such as carpet and insulation typically require removal rather than drying in place.
Category 3 water is the most serious. Sewage backflow and floodwater carry pathogens, and any porous material that has been in contact with Category 3 water is generally considered unrestorable. This category also presents electrical hazards if water has reached switchboards, power outlets, or appliances. Do not enter a flooded space where electrical circuits may still be live.
Categories can escalate. Clean water that sits untreated for 48 to 72 hours will begin to support microbial growth and effectively become grey or black water. The category you are dealing with is not fixed; it depends on how long the water has been present and what it has come into contact with.
How to Document Water Damage for an Insurance Report
Good documentation is what separates a claim that moves forward from one that stalls. Insurers and courts need specific, dated, verifiable evidence. Vague descriptions and a handful of photos taken after repairs have started are rarely sufficient. Document before anything is touched.
Follow these steps in order, starting the moment you discover the damage.
Photograph everything before any remediation begins. Take wide shots to establish context, then close-up shots of each affected area. Include a reference object such as a ruler or coin to show scale. Capture stains, peeling surfaces, warped timber, efflorescence, and any visible mould. Date-stamp each image if your device allows it, or note the date and time in a written log immediately after.
Record a written description of each affected area. Note the room, the surface affected (ceiling, wall, floor), the approximate dimensions of the damage, and any odour. Write this down the same day. Memory degrades quickly, and a handwritten or typed log with a date carries more weight than a later recollection.
Take a water meter reading and record it. If you have already confirmed active water loss through the meter test described earlier, photograph the meter display and note the reading with the date and time. A second reading taken 24 hours later, with all fixtures still shut off, documents the rate of loss.
Preserve physical evidence where possible. If a pipe fitting, hose, or fixture component has failed, keep it. Do not discard damaged materials until an assessor has inspected the site. A failed waterproofing membrane, a cracked pipe section, or a corroded fitting can be critical evidence in a dispute.
Log every communication. Record the date, time, and content of every conversation with your insurer, builder, plumber, or property manager. Follow up verbal conversations with a brief written summary sent by email. This creates a contemporaneous record that is difficult to dispute later.
Obtain a meter reading from your water utility if the leak was prolonged. Water authorities can sometimes provide historical consumption data that supports a claim for loss over an extended period. According to US EPA data, household leaks waste more than 9,300 gallons of water per year on average, which translates to a measurable consumption anomaly that utility records may reflect.
If your matter proceeds to an insurer's assessor or a tribunal, this documentation forms the factual foundation of your position. Gaps in the record are gaps in your claim. Swedish insurance data from 2024 recorded approximately 90,000 water damage claims in a single year, which reflects how frequently these matters are formally disputed and why a clear evidentiary record matters from the outset.
Who Pays for Water Leak Damage?
Liability for water damage depends on where the water originated, who owns or controls that part of the property, and whether the damage resulted from a defect, neglect, or an unforeseen event. There is no single answer, but the following scenarios cover most situations homeowners encounter.
Owner-occupiers are generally responsible for damage originating within their own property boundary. If a supply pipe inside your home fails, the cost of repair and any resulting damage to your own structure falls to you, subject to your home and contents insurance policy. Whether your insurer covers the event depends on the cause: sudden and accidental failures are usually covered; gradual leaks resulting from lack of maintenance often are not.
Landlord and tenant situations are more complex. Landlords have a duty to maintain the property in a habitable condition. A leak caused by a structural defect or ageing infrastructure is generally the landlord's responsibility. A tenant who causes damage through misuse or who fails to report a known leak promptly may bear some responsibility for the resulting damage.
Strata properties introduce an additional layer. Water damage originating from common property, such as a shared roof, external walls, or common drainage, is typically the responsibility of the owners corporation. Damage originating within a lot is the lot owner's responsibility. The boundary between lot and common property is defined by the strata plan and the relevant legislation, and disputes over that boundary are common.
Builder defects are a separate category entirely. If water damage results from defective waterproofing, non-compliant drainage, or faulty construction work, the builder may carry liability under statutory warranties. In NSW, the Home Building Act 1989 provides for statutory warranties on residential building work, and defects in waterproofing are among the most frequently litigated. If you suspect the damage has a defect origin, assess the liability question with professional advice rather than resolving it informally.
When Water Damage Points to a Building Defect: Getting a Professional Assessment
DIY detection methods work well for locating active leaks in accessible areas. They are less effective when the source is concealed within a wall assembly, when waterproofing has failed beneath a tiled surface, or when the damage pattern points to a systemic defect rather than a single point of failure.
Several indicators suggest the problem has moved beyond what a homeowner can reliably assess:
- Moisture is present in multiple locations without an obvious shared source.
- The damage has recurred after a previous repair.
- The affected area includes a bathroom, balcony, or wet area where waterproofing compliance is relevant.
- You are preparing for an insurance claim, an NCAT application, or a dispute with a builder.
In these situations, a formal building inspection produces a documented, evidence-based assessment that carries weight with insurers, tribunals, and courts. A building defect report identifies the defect, its cause, its scope, and the rectification required. That is a different product from a tradesperson's quote, and it serves a different purpose.
For NSW homeowners dealing with suspected defects, a building defect report provides the structured evidence base needed to support a formal claim or dispute. Awesim Building Consultants is an Australian building consultancy that has been preparing independent expert reports, forensic waterproofing inspections, and evidence for NCAT and court proceedings across NSW since 1996.
What Is Water Mitigation and Why Does It Matter?
Mitigation stops the spread of moisture before it penetrates deeper into the building fabric, causes structural decay, or creates conditions for mould growth. It is not the same as repair or restoration.
In practice, mitigation typically involves four stages: stopping the water source, extracting standing water, drying out affected materials using industrial dehumidifiers and air movers, and treating surfaces to prevent microbial growth. The sequence matters. Attempting to repair finishes before the substrate is fully dry is one of the most common reasons water damage recurs.
Time is the critical variable. Mould can begin to establish within 24 to 48 hours of a moisture event, and timber framing, insulation, and plasterboard absorb water quickly. The longer mitigation is delayed, the greater the scope of material that requires removal rather than drying.
For homeowners, the practical implication is straightforward: once you have identified the source and documented the damage, act on drying and containment before any cosmetic repairs begin. If the affected area includes structural elements, concealed cavities, or a wet area where waterproofing may have failed, professional mitigation is the appropriate response. A contractor who dries and repairs without confirming the source has been resolved is not mitigating the problem; they are deferring it.
FAQs
Can water damage appear without a visible leak?
Yes. Water damage frequently develops without any visible leak at the point of origin. Moisture can travel through wall cavities, along structural members, and beneath floor coverings before it becomes visible at a surface. Condensation within wall assemblies, failed waterproofing membranes beneath tiled surfaces, and slow seepage through masonry all cause progressive damage that may not produce an obvious wet patch for months. Musty odours, soft flooring, and swollen timber are often the first detectable signs.
How long does it take for water damage to cause mould?
Mould can begin to grow within 24 to 48 hours of a moisture event, given the right temperature and an organic substrate to feed on. Plasterboard, timber framing, and carpet backing are particularly susceptible. Visible mould growth may not appear for several days or weeks after the initial event, but spore activity can begin well before that. Drying and containment need to start as soon as the source is identified, not after repairs are planned.
Is a water damage inspection covered by home insurance?
This depends on your specific policy and insurer. Some home insurance policies cover the cost of locating a concealed leak as part of a claim, particularly where the damage itself is covered. Others treat the inspection as a separate cost borne by the policyholder. Review your product disclosure statement carefully, and ask your insurer in writing whether investigation costs are included before commissioning an inspection. Keep a record of that response.
How do I write a water damage report for a legal dispute?
A report suitable for a legal dispute needs to be factual, dated, and specific. It should identify each affected area with its location and dimensions, describe the visible damage in plain terms, include dated photographs, record any meter readings or utility data, and note the sequence of events from first observation to the time of writing. For NCAT or court proceedings in NSW, a formal expert report prepared by a qualified building consultant carries significantly more weight than a homeowner's own account. If your matter is heading toward a tribunal, engage a professional to prepare or review the documentation.
What is the difference between water damage and water intrusion?
Water intrusion refers specifically to water entering a building from an external source, such as rainwater penetrating a roof, wall, or below-ground structure. Water damage is the broader term for any harm caused by unwanted water, regardless of whether it originates externally or internally. A burst pipe causes water damage but not water intrusion. A failed external waterproofing membrane causes both. The distinction matters in disputes and insurance claims because the cause of entry affects which party carries liability and which part of a policy responds.
Conclusion
Water damage is rarely a single event with a single cause. It develops gradually, travels unpredictably, and often reflects an underlying defect rather than a one-off failure. Work through the detection steps in order, document what you find before anything is disturbed, and understand which category of water you are dealing with before deciding how to respond.
If the source turns out to be a failed waterproofing assembly, a recurring defect, or something concealed within the building fabric, a professional inspection is the appropriate next step. Start with your documentation, confirm the water source is fully resolved before any cosmetic repairs begin, and if the matter involves a builder or strata dispute in NSW, get an independent report prepared for that purpose.

Related Posts
Water Damage in Homes: How to Track Down the Source
Water damage in a home rarely announces itself at the source. A stain on the ceiling, a musty smell in
Read More »
Waterproofing Membrane Types: Which Fails Most in NSW Bathrooms
Waterproofing failure is the single most common serious defect found in NSW apartments, and the type of membrane used, along
Read More »
Building Certifier NSW: Role, Limits, and When You Need More
A building certifier in NSW is a registered professional who issues construction certificates, conducts critical stage inspections, and grants occupation
Read More »