
The term lock up stage is a huge milestone in any new home build. It’s that exciting point where your project transforms from a bare-bones frame into something that actually looks and feels like a house. Essentially, it means the building is now a secure, weatherproof shell, because all the external doors and windows have been fitted.
The structure is now officially “locked up” from the elements and secure from unauthorised entry, paving the way for all the internal work to get started.
What the Lock Up Stage Really Means for You
Think of it like building a high-performance car. The slab and frame are the chassis – the foundation for everything else. The lock up stage is when the body panels, windscreen, and doors are finally fitted. Your project goes from being an open, vulnerable frame to a sealed, secure vessel, ready for the intricate work to begin inside.
This isn’t just builder jargon; it’s a massive moment for you as a homeowner. It brings a real sense of progress and security. Your house finally looks like a house, and you can physically lock the front door for the very first time.
The Big Shift from Outside to Inside
Once the building is secure and weatherproof, the entire focus of the project pivots. The risk of rain damaging internal materials like plasterboard, timber floors, and insulation drops dramatically. This means the builder can confidently bring in the more delicate and expensive materials for the internal fit-out.
Work that can now kick off includes:
- First-fix trades: This is where electricians and plumbers run all the initial wiring and pipework through the walls and ceilings.
- Insulation: With no more risk of getting soaked, wall and ceiling insulation can be installed.
- Plasterboard lining: The internal walls and ceilings get sheeted, and you suddenly have properly defined rooms.
This stage is also a major financial checkpoint. It typically triggers one of the largest progress payments in your building contract. That’s why it’s absolutely critical to make sure everything is spot-on before you sign off on that payment and hand over your hard-earned money.
To help clarify what this stage involves, here’s a quick overview of the key components.
Key Components of the Lock Up Stage at a Glance
| Component | Description | Purpose |
|---|---|---|
| External Wall Cladding | The outer skin of the house, like brickwork, weatherboards, or render. | Provides the primary barrier against wind, rain, and external temperatures. |
| Roof Covering | The complete roofing system, including tiles or metal sheeting, plus sarking and flashings. | Protects the entire structure from overhead weather and directs water away. |
| Windows & Glazing | All external windows are fully installed, glazed, and sealed. | Allows natural light in while keeping the weather out and securing the building. |
| External Doors | All doors leading to the outside are fitted, including temporary locks. | Completes the security of the building and the weatherproof seal. |
Getting these elements right is non-negotiable for the long-term health of your home.
More Than Just a Locked Door
The term “lock up” naturally makes you think about security from theft, and that’s part of it. But in the building world, it’s much more about achieving a completely weatherproof seal. It’s all about creating a controlled internal environment so the next phases of work can proceed without a hitch.
Reaching the lock up stage is more than a construction checkpoint; it’s your first real opportunity to assess the quality of your home’s protective shell. Any defects in the roofing, cladding, or window installation at this point can lead to significant problems like leaks and drafts down the line.
Ultimately, a properly completed lock up sets the standard for the rest of the build. It’s the foundation of your home’s structural integrity and its ability to protect you from the Australian climate. A thorough, professional inspection at this point isn’t just a good idea—it’s an essential step for any homeowner who cares about quality.
A Breakdown of What Is Included at Lock Up
When your builder tells you they’ve reached the lock up stage, it means the external shell of your home is finally complete and secure. This isn’t just a casual term; it’s a major milestone that signifies your new home is now weatherproof and can be, well, locked up. Knowing exactly what this involves is crucial, as it’s usually tied to a significant progress payment you’ll need to approve.
Think of it as your home putting on its permanent armour. Each component has a critical job, and they all need to be installed perfectly to protect everything that’s about to happen inside. Let’s walk through what you should expect to see on site.
External Wall Cladding: The Home’s First Defence
The most obvious change you’ll see at lock up is that the external walls are completely finished. This is your home’s primary shield against wind, rain, and the harsh Aussie sun. Depending on your design, the cladding could be brick, weatherboards, or a rendered finish, each handled by a different specialist trade.
- Brickwork: If you’re building with brick veneer, every last brick should be laid. The bricklayers are responsible for more than just stacking them; they need to ensure the mortar joints are consistent and that the weep holes—those small gaps that let moisture escape—are properly in place.
- Weatherboards or Siding: For homes with lighter cladding, like classic timber weatherboards or modern fibre cement panels, all of it should be fixed securely by the carpenters. The real skill here is in allowing for natural expansion and contraction while making sure no water can sneak in behind the boards.
- Render or Acrylic Texture: If your home is getting a rendered finish, the base coats should be applied over the brick or foam substrate. This is the job of solid plasterers or renderers, who create that smooth, seamless look that also acts as a tough, protective layer.
Whatever the material, the entire external wall system must be done. This is the point where your house really starts to look like the finished product from the outside.
Roofing: A Complete Overhead Seal
Look up. The whole roofing system should be buttoned up, forming a complete umbrella over the structure. A roof is so much more than just tiles or metal sheets; it’s a carefully integrated system of protective layers, all installed by professional roofers.
By the lock up stage, you should see:
- Roof Covering: All tiles or metal sheeting (like Colorbond) are fixed down tight.
- Sarking and Insulation: Underneath the roof covering, a protective membrane called sarking should be installed. This acts as a second line of defence against water and also provides a layer of reflective insulation.
- Flashings and Cappings: This is where the detail work really matters. Critical metal flashings around chimneys, vents, and in the valleys of the roof must be in place to channel water away safely. The ridge capping, which seals the very peak of the roof, should also be complete.
The roofing system is one of the most critical elements for your home’s long-term health. A single mistake here, such as a missing flashing or a cracked tile, can go unnoticed for years before revealing itself as a major, costly leak. This is why a detailed inspection at the lock up stage is so important.
The main goal here is to achieve a completely watertight seal. Once the roof is on and sealed, the builder can bring in the plasterboard and other internal linings without worrying about them getting ruined by a sudden downpour.
Windows and External Doors: Securing the Perimeter
The final pieces of the puzzle that officially bring a home to lock up are the windows and external doors. Installing them completes the secure, weatherproof envelope of the building. This work is usually done by carpenters or specialist window and door installers.
Here’s what you need to see:
- All External Windows: Every single window frame should be installed, glazed (meaning the glass is fitted), and properly sealed into the wall openings. They also need to be plumb and level so they’ll open and close smoothly down the track.
- All External Doors: This means your front door, laundry door, sliding doors—any door that leads outside. They must be hung in their frames and fitted with at least temporary locks. This is what literally puts the “lock” in “lock up.”
- Garage Door: Don’t forget the garage. The main vehicle access door has to be installed to make the entire property fully secure.
With every window and door in, the house is finally a lockable, secure structure. It’s protected from the weather and from anyone wandering in, marking a clear end to the external construction phase and the beginning of the internal fit-out.
Your Essential Lock Up Stage Inspection Checklist
Hitting the lock up stage is a huge milestone. It’s the point where your house finally starts to look like a house, and the excitement is real. But before you get carried away and approve that next big progress payment, it’s absolutely critical to slow down and do a thorough inspection. This isn’t about nitpicking; it’s about making sure the very shell of your home is sound, secure, and built to handle whatever the weather throws at it.
The best way to tackle this is with a methodical walk-through. Think of it as a systematic sweep of the property, starting from the outside and then working your way in. This approach helps ensure nothing gets missed, because a small detail overlooked now can easily become a major headache down the track. Your mission is to confirm that everything is not only installed but installed correctly.
This infographic breaks down the basic flow of work that gets you to a secure, weatherproof structure.
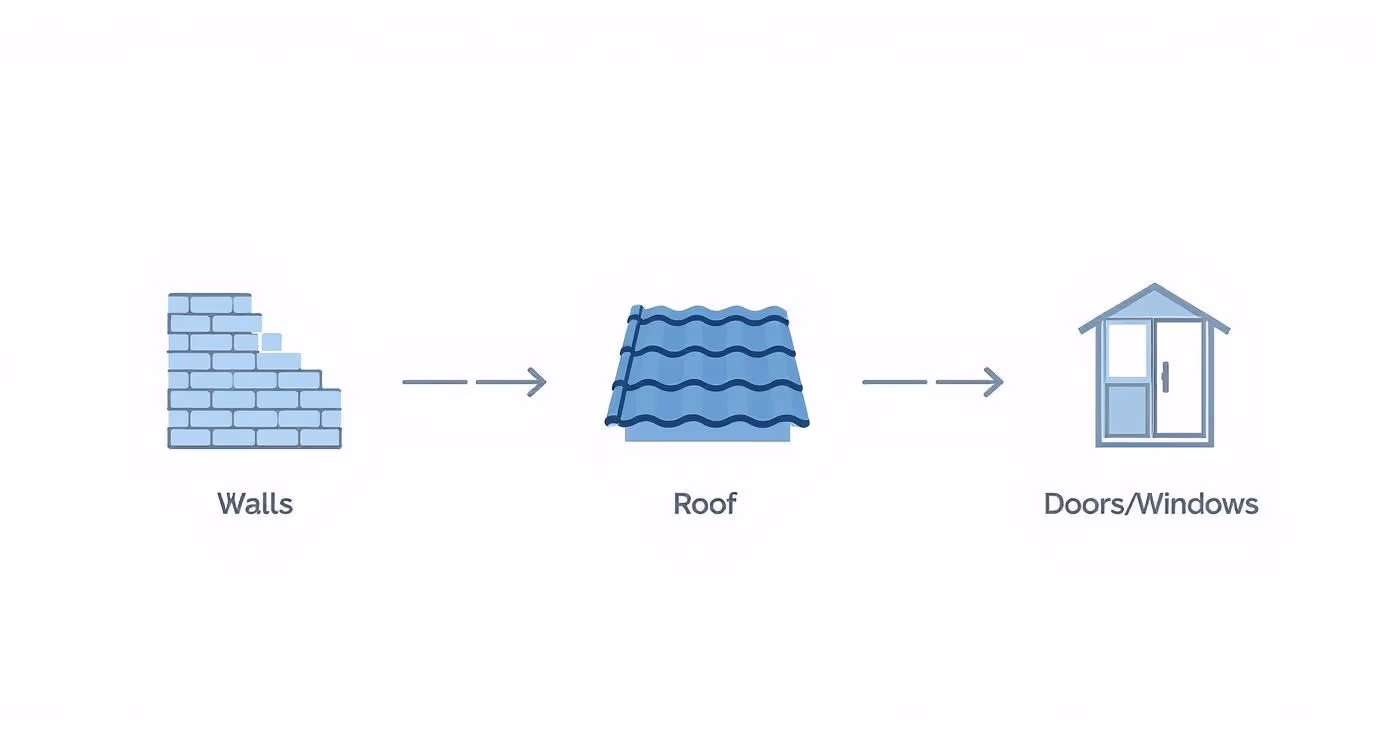
Each of these steps relies on the one before it, all leading to a sealed building that’s ready for the internal fit-out to begin.
Your Visual Walk-Through Outside the Home
Begin your inspection with a slow walk around the entire perimeter of the house. Start from a distance to get a feel for the overall look, then get right up close to check the finer details. Your main focus here is on the quality of the finish and, most importantly, the integrity of the weatherproofing.
Here’s a checklist for the exterior:
- Wall Cladding: Look closely for any cracks, chips, or dings in the bricks, render, or weatherboards. If you have brickwork, are the mortar joints consistent? Crucially, are the weep holes clear and unobstructed?
- Roofing: Scan the roof for any loose, cracked, or crooked tiles or metal sheets. Check that the ridge capping is securely in place and that the flashings around pipes, vents, and valleys look properly installed and sealed.
- Gutters and Downpipes: Are all the gutters and downpipes installed as shown on your plans? They play a vital role in channelling water away from your home’s foundations, so they have to be right.
- Window and Door Frames: Get up close and inspect the seals around every single window and external door frame. You shouldn’t see any gaps between the frame and the wall cladding—these are prime entry points for water.
Stepping Inside for the Internal Check
Once you’ve given the exterior a good look over, it’s time to head inside. The focus now shifts to checking how well those external elements are performing from the inside and confirming that the house is genuinely secure.
Your internal checklist should cover these points:
- Operate Everything: This is non-negotiable. Open and close every window and external door. Do they move smoothly, or do they stick, jam, or catch?
- Lock and Key: Test the locks on all external doors. This is the “lock up” stage, after all. You need to be certain the home can be properly secured.
- Check for Light and Drafts: On a bright day, stand inside and look for any slivers of light peeking through around the window and door seals. If light can get in, so can drafts and water.
- Examine Wall Wrap: Take a look at the internal side of the external walls. The building wrap (or sarking) should be intact, without any significant rips or tears. It’s your second line of defence against moisture.
While a careful homeowner can spot many of these more obvious issues, it’s so important to recognise the limits of a visual check.
A homeowner’s inspection is an excellent first pass, focusing on aesthetics and basic functionality. However, it cannot replace the technical assessment of a professional who understands the National Construction Code and Australian Standards inside and out.
Homeowner vs. Professional Inspection
There’s a world of difference between what you can reasonably check yourself and what a qualified building consultant from a firm like Awesim Building Consultants will assess. A house might look perfectly fine and feel secure, but it could still have underlying compliance issues that you’d never spot. Even the definition of what constitutes a proper “lock up” can vary. For example, justice system statistics show huge regional differences in other regulated areas; the imprisonment rate in the Northern Territory was 1,410.9 per 100,000 adults, while Victoria’s was just 116.7 as of June 2025. You can read more about these regional justice statistics on the Australian Bureau of Statistics website. In the same way, building standards and how they’re enforced can differ, which makes expert local knowledge invaluable.
This table gives a clearer picture of where a professional adds critical value.
Homeowner vs Professional Inspection Focus Areas
While you can check the finished product, a professional understands the “how” and “why” behind the build, assessing compliance with complex Australian Standards that are hidden from view.
| Inspection Point | Homeowner Check (Visual) | Professional Inspector Check (Technical) |
|---|---|---|
| Window Flashing | Checks for visible gaps around the window frame. | Verifies correct installation of waterproof membranes and flashings as per AS 2047, often done before the cladding is even installed. |
| Roof Tie-Downs | Looks for loose tiles or sheets from the ground. | Assesses if structural tie-downs and bracing meet the engineering specifications for wind loading—a critical safety check. |
| Weep Holes | Confirms holes are present and not blocked by mortar. | Checks for correct placement, spacing, and size according to the specific brick type and local environmental conditions (e.g., coastal). |
| Frame Straightness | Sees if the walls look straight to the naked eye. | Uses spirit levels, straight edges, and laser tools to measure for plumb, level, and straightness within the strict tolerances of AS 1684. |
Ultimately, bringing in an expert for your lock up stage inspection isn’t an expense; it’s an investment. It gives you the peace of mind that the structural shell of your new home is not just visually appealing but technically sound, safe, and compliant. It’s a small price to pay to protect your much, much larger one.
Common Defects Found During Lock Up Inspections

Knowing what to look for is your best defence against expensive repairs down the track. While reaching the lock up stage feels like a huge win, it’s also a point where some pretty serious construction defects can be hiding in plain sight. Spotting these red flags now is so much simpler—and cheaper—than dealing with the fallout later.
When you know the common pitfalls, your site visit goes from being a casual walkthrough to a proper quality control check. These issues aren’t just about looks; they often point to deeper problems with workmanship or compliance that can affect your home’s durability, weatherproofing, and energy efficiency for years to come.
Let’s break down the most common offenders we see on site.
Flawed Brickwork and Mortar Joints
The brickwork is your home’s first line of defence, but a poor installation can leave it weak. As you walk around the outside, take a close look at the mortar joints between the bricks. They should have a consistent thickness and colour, giving the wall a clean, uniform look.
Sloppy, uneven mortar joints are more than just an eyesore. They often signal rushed work, which usually means other problems are lurking nearby. Even more critical are the small gaps deliberately left in the mortar, known as weep holes. These are absolutely essential for letting any moisture that gets behind the bricks escape. If they’re clogged with mortar or missing altogether, you’re basically creating a perfect recipe for damp and long-term decay.
Poorly Sealed Windows and Doors
The whole point of the lock up stage is to make the building weatherproof, and that all comes down to how well the windows and external doors are installed and sealed. Any gaps between the frame and the wall cladding are a major red flag. They’re a direct invitation for drafts and water to get in.
Even tiny gaps can cause big headaches over time, including:
- Water Damage: Wind-driven rain will find its way inside, leading to rot in the timber frame and encouraging mould to grow.
- Poor Energy Efficiency: Drafts make your home much harder (and more expensive) to heat and cool, completely undermining your insulation.
- Pest Entry: Small openings are an open door for insects and other pests to set up camp inside your walls.
It’s so important to run your hand around every single frame and check for a complete, unbroken seal. The consequences of getting this wrong are severe, and you often won’t discover them until long after you’ve moved in.
Roofing Mistakes and Incomplete Flashing
Your roof is the single most important element protecting your home. From the ground, it might look finished, but the devil is always in the detail. Common defects we find at lock up include dislodged or cracked tiles, or metal roof sheets that haven’t been fastened down properly.
Another critical component is the flashing. These are thin strips of metal installed wherever the roof meets another surface—like a wall, chimney, or vent pipe. Their job is to channel water away from these vulnerable spots. Improperly installed or missing flashing is one of the top causes of roof leaks, and a leak can cause catastrophic damage to ceilings, walls, and the internal frame.
Identifying a single poorly sealed window or a piece of missing flashing during the lock up stage can prevent thousands of dollars in future repairs. It’s the difference between asking a builder to apply a bit more sealant now versus replacing a rotten window frame and mouldy plasterboard in five years.
Compromised Wall Wrap
Before the external cladding (like bricks or weatherboards) goes on, a protective membrane is fixed to the timber frame. You might know it as sarking or wall wrap. It acts as a secondary weatherproof skin and a vapour-permeable layer, which stops moisture from getting in but allows the timber frame to breathe.
Unfortunately, this wrap often gets torn or damaged during the chaos of construction. While a few small nicks are expected, large rips or sections where the seams aren’t taped properly defeat the whole purpose. A compromised barrier means lower energy efficiency and allows moisture to get into the wall cavity, putting the structural timber at risk of rot.
The scale of building projects, whether a single home or larger infrastructure, demands this level of attention to detail. Since 2000, Australia has constructed 37 new prisons, adding over 14,000 beds and nearly doubling the national prison design capacity. You can discover more about this surge in correctional infrastructure and its community impact at the UNSW Newsroom. Just as these massive projects need rigorous oversight, so does the protective shell of your new home. Catching these defects early is the key to ensuring your investment is built on a solid, compliant, and durable foundation.
Navigating Payments and Resolving Disputes
When the invoice for the lock up stage lands in your inbox, it’s a big moment. This is often one of the most substantial payments in the entire build, and there’s a natural pressure to pay it quickly and keep the momentum going. But this is a time for diligence, not speed.
Think of your building contract as the rulebook. It lays out exactly what needs to be finished before that payment is officially due. By paying that invoice, you’re legally signalling that you’ve inspected the work and you’re happy with it. Once that money is sent, getting the builder to come back and fix lingering issues becomes a whole lot harder. Your leverage practically disappears overnight.
It’s a common trap to think, “I’ll just pay it now and we can sort out the small stuff later.” In reality, this almost always creates more headaches. The builder’s crew has already moved on to the next phase, and your “small stuff” falls to the bottom of their priority list. You have to stand your ground and make sure every single requirement for the lock up stage is met before you approve the payment.
What to Do if Work Is Incomplete or Defective
So, what happens when your inspection turns up problems? The first step is to communicate clearly and formally. Pick up the phone, but follow it up immediately with an email.
Vague feedback like “some of the windows don’t feel right” won’t cut it. You need to be specific. Your written notice to the builder should include:
- A detailed list of every defect or incomplete item you’ve found.
- A note referencing the relevant clauses in your building contract.
- A polite request for a timeline to get everything fixed.
- A clear statement that you will make the progress payment as soon as the issues are resolved.
This simple act creates a crucial paper trail. It moves the conversation from a casual chat to a documented record, which is vital for protecting your rights if the disagreement continues.
When Disputes Arise: The Power of an Expert Witness
Unfortunately, sometimes you and your builder will simply see things differently. You might be looking at exposed sarking and unsealed windows, believing the stage is far from complete, while your builder is demanding payment. When you hit this kind of stalemate, opinion no longer matters—only evidence does. This is where an independent Expert Witness Report becomes your most powerful tool.
An Expert Witness Report isn’t just another inspection checklist. It’s a forensic, unbiased analysis that compares the work on your site against the National Construction Code, Australian Standards, and the fine print of your building contract.
An expert building consultant, like the team at Awesim Building Consultants, provides an impartial, professional assessment that carries serious weight. Unlike a standard inspector, an Expert Witness is qualified to prepare reports that stand up in formal settings like the NSW Civil and Administrative Tribunal (NCAT). Their conclusions are based on cold, hard facts and building science, not emotion.
This report gives your claims undeniable authority, transforming a frustrating “he said, she said” argument into a fact-based discussion. It will pinpoint non-compliant work, explain how it should be rectified, and give you the evidence you need to either negotiate a fair resolution or move forward with a formal dispute. It ensures your voice is heard and helps you get the quality home you’re paying for.
Got Questions About The Lock-Up Stage? We’ve Got Answers
Hitting the lock-up stage is a huge milestone in your build, and it’s completely normal to have a few questions swirling around. After all, it’s a major checkpoint for both the structure and your finances, so feeling confident about what’s happening is essential. Let’s walk through some of the most common queries we hear from homeowners.
Getting clear on your rights, your builder’s responsibilities, and the flow of the construction process can head off a lot of potential headaches. This is your best chance to make sure the fundamental shell of your new home is spot-on before the focus shifts to all the interior details.
What if My Builder Asks For the Lock-Up Payment Early?
This is a classic scenario. The builder calls, announces they’ve reached lock-up, and the invoice lands in your inbox. But when you pop by the site, you see the laundry door is missing, or a couple of windows haven’t been sealed yet.
So, what do you do? Your building contract is the single source of truth here. It will have a precise definition of what needs to be completed for the lock-up stage to be officially ticked off. A stage isn’t 95% done; it’s either complete or it isn’t.
If your builder is chasing payment before the work is genuinely finished, you are well within your rights to hold off until the contract terms are met. The key is to communicate this clearly, professionally, and always in writing.
A Firm But Fair Response Might Look Like This:
“Hi [Builder’s Name], thanks for sending through the invoice for the lock-up stage. I had a look at the site today and noticed the [specific item, e.g., alfresco sliding door] hasn’t been installed yet. Our contract states that lock-up is achieved once all external doors are fitted. I’m all set to make the payment as soon as this is done. Could you let me know when you think that will be?”
This approach keeps things professional, creates a paper trail, and clearly states the issue without being confrontational.
Can I Go and Inspect the Site Myself at Lock-Up?
Yes, and you absolutely should! But there’s a right way to do it. A building site is a workplace, and it comes with its own set of risks. The builder is ultimately responsible for everyone’s safety on site, which means you can’t just drop in unannounced for a wander.
Always get in touch with your site supervisor to arrange a time to visit. It’s a simple courtesy that ensures they can make the site safe for you and shows respect for their workflow. When you’re there, focus on the visual checks we’ve talked about—open and close every window and door, look for obvious gaps or cracks, and check for any visible damage.
That said, your own walkthrough is no substitute for a professional inspection. A building consultant brings a trained eye, armed with deep knowledge of the Australian Standards and the National Construction Code. They’ll spot the kinds of compliance and quality issues you’d never see, ensuring the structural shell of your home is sound, not just looking good from a distance.
What’s the Difference Between the Lock-Up and Fixing Stages?
Knowing how the stages of construction flow helps you keep track of progress and manage your expectations. The lock-up and fixing stages are two distinct phases that follow each other, and they have completely different goals.
The Lock-Up Stage: This is all about creating a secure, weatherproof shell. The work is focused exclusively on the building’s exterior—getting the walls, roof, windows, and external doors in place. Once lock-up is achieved, your home is sealed and protected from the elements.
The Fixing Stage: This phase kicks off after lock-up is fully complete. Now, the attention turns inwards, where trades start “fixing” all the internal linings and features to the frame. This is when you’ll see plasterboard go up, along with internal doors, architraves, skirting boards, and cabinets.
Here’s an easy way to think about it: the lock-up stage builds the sturdy, protective box. The fixing stage is when we start filling that box with all the internal walls and details that begin to make it feel like a home. Each stage must be properly signed off before the next one can get underway.
Navigating the complexities of the lock up stage can be daunting, but you don’t have to do it alone. Ensuring every detail is correct now protects your investment for a lifetime. If you have concerns about workmanship, need an independent assessment before making a payment, or find yourself in a dispute, Awesim Building Consultants provides the expert, unbiased analysis you need. With over 35 years of hands-on experience, we deliver clear, factual reports to give you confidence and resolve issues effectively. Protect your project by getting in touch with us at https://www.awesim.com.au.


