
Early Stage Signs of Termites in Ceiling: Key Tips 2026
You notice a hairline crack running along the hallway cornice, or a faint brown mark above the bathroom door. Perhaps the ceiling has dipped slightly near the smoke alarm. It's easy to blame a warm week, an old paint job, a minor roof leak, or plaster fatigue. From the floor, these defects can look harmless.
A ceiling can be a diagnostic surface for termite activity. Hidden timber around joists, cornices, roof framing, and wall junctions may be weakened before the damage becomes obvious from inside the room. The early stage signs of termites in ceiling areas often overlap with water and rodent damage, so the useful question isn't “What does this mark look like?” It's “What does the pattern, texture, location, and roof-space evidence say together?”
Why Your Ceiling Often Tells the Story First
A homeowner will often notice the first clue while doing something unrelated. A ladder comes out to replace a light globe, the hallway is repainted, or a ceiling fan starts making a faint movement. At a low angle, the torch catches a raised paint blister along a cornice join. In another room, a thin crack follows the edge of the ceiling sheet. These details are commonly dismissed because the surface still looks mostly intact.
Termites can move through timber-framed parts of a NSW home by following ceiling joists, perimeter members, cornice timber, and roof framing. When those materials are excavated or weakened, the ceiling lining may be the first broad, visible plane to deform. Floors may hide damage beneath tiles, carpets, and underlay. Walls conceal timber behind plasterboard, skirtings, cabinetry, and paint. The ceiling, by contrast, can reveal a localised sag, blister, stain, or cracking pattern in a place the eye naturally scans every day.
Practical rule: A small ceiling defect deserves more attention when it sits beside a cornice, fan housing, roof penetration, external wall junction, or accessible roof framing.
The risk isn't theoretical. A Forest & Wood Products Australia summary estimated that major structural termite damage affects about 0.3% of Australian households over an average ownership period of 9.1 years, roughly 1 in every 333 households nationwide (FWPA termite damage summary). In Sydney, a CSIRO/FWPRDC survey cited termite incidence of 33.5% outside and 17% inside (Sydney termite incidence survey). Those figures don't prove that every ceiling stain is termite-related, but they explain why a NSW owner shouldn't treat roof-void evidence casually.
The clues that matter most are fine bubbling, pinholes, yellow-brown marks, dropped wings, soft or hollow surfaces, frass, mud trails, and localised sagging. The inspection method matters just as much as the checklist, because the ceiling must be compared with what's visible above it.
Early Visual and Tactile Clues on the Ceiling
Start with the surface and work from the most easily overlooked signs towards the more concerning ones.
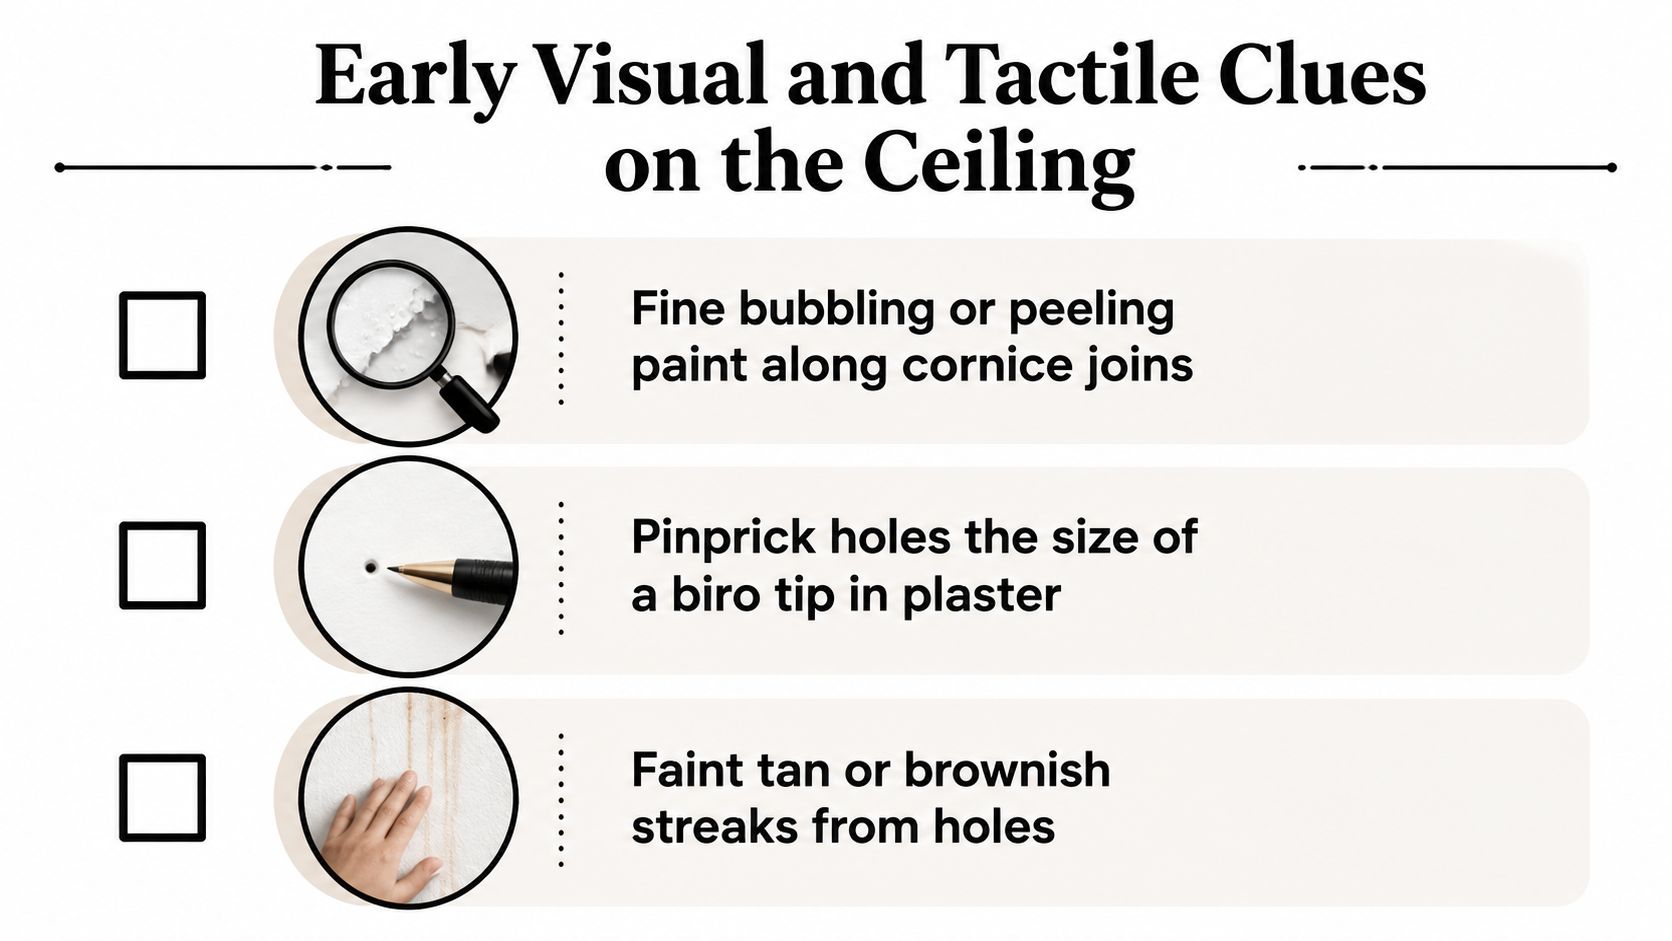
Fine bubbling or peeling paint along a cornice join can indicate moisture, movement, or damage behind the finish. Cornice capping timber and nearby framing can provide a concealed route, so inspect the adjoining wall and roof space rather than repainting immediately.
Pinprick holes in plaster or a ceiling sheet may be small exit points, damage around a gallery, or an unrelated surface defect. A biro-tip-sized hole surrounded by fine dust, blistering, or several similar holes deserves closer inspection.
Faint yellow-brown streaks or a tan patch can look exactly like a roof or plumbing leak. Termite-related damage may have a patchy, granular, blistered texture rather than a clean spreading tide mark. A bathroom fan housing is a common overlap zone because condensation, duct leaks, roof penetrations, and timber access can all exist in the same area.
What your hand and ears can add
Run the back of your fingers lightly across a suspect area. A soft, papery, or uneven feel can suggest that the ceiling lining has lost integrity. Don't press hard. A compromised sheet may fail without warning.
Tap gently around, not directly through, the defect. A hollow thud compared with the surrounding ceiling can indicate voiding or galleries within timber or lining materials. If fine gritty dust drops when a tube or damaged edge is brushed, stop disturbing it and photograph the material in place. For further context on hollow wood termite warning signs, compare the sound and texture with the surrounding sound timber rather than relying on one tap.
Dropped wings near a light fitting, window, door, or skirting can indicate a recent swarm and an existing colony, particularly when the wings sit below a ceiling or roof-space access point. Mud spotting, shelter trails, and fine frass are stronger when found in the same ceiling bay as bubbling, softness, or hollow timber.
A single mark is suggestive, not conclusive. Several clues clustered around one cornice, fan, ceiling joint, or perimeter bay justify an internal and roof-space inspection.
Inspecting From Inside and From the Roof Space
A ceiling mark near a cornice, fan, or access hatch deserves a controlled inspection, not a quick poke. Start inside the rooms with a torch, phone camera, and stable ladder. Equipment does not make an unsafe roof void safe. Australian Standards-based visual inspections cover accessible timber only, without dismantling ceiling linings, insulation, or concealed components, as explained in this Australian inspection guidance on accessible roof framing.
Start below the ceiling
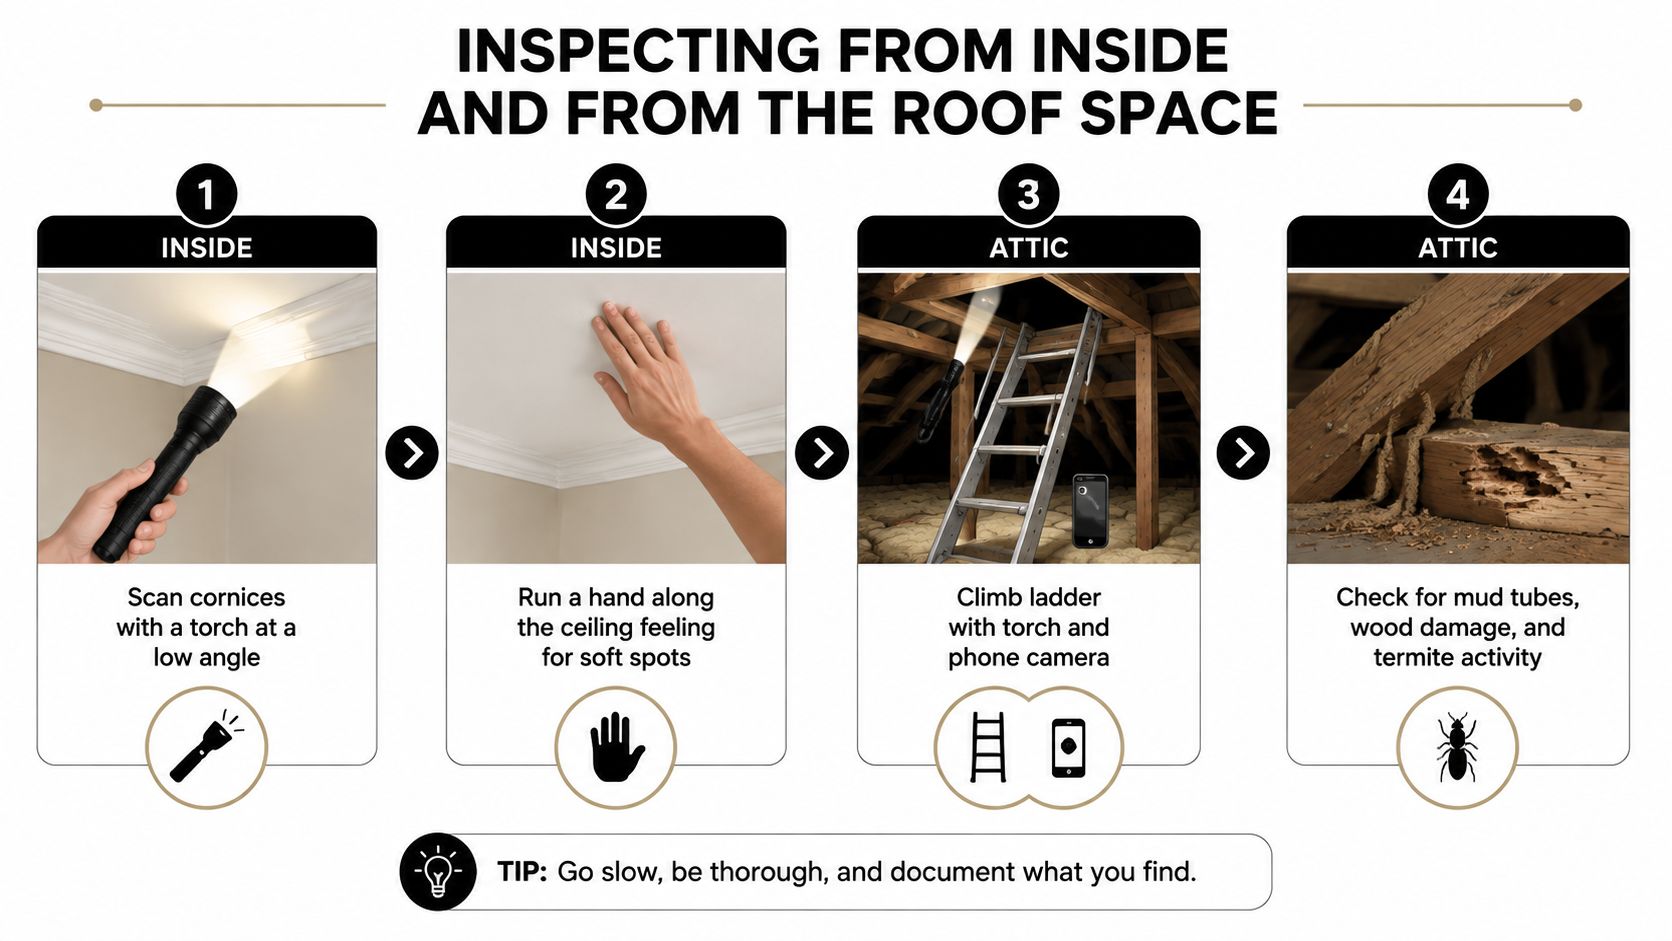
Hold the torch at a low angle across cornices and sheet joins. Side lighting can show raised paint, shallow ripples, pinholes, and cracks that direct light hides. Check bathroom, kitchen, and hallway fan housings for frass trails, brown marks, loose fittings, or staining that runs towards a roof penetration.
Walk around the room and compare the suspect bay with an unaffected area. Record the room, exact position, approximate size, surface texture, colour, and nearby features such as a cornice, light, fan, access hatch, or external wall. Photograph the area before touching it. A ceiling is a diagnostic surface, so the relationship between the mark and the roof-space feature matters as much as the mark itself.
Check what's visible from outside
From ground level, inspect weep holes, ant caps, and subfloor vents for blockage or alteration. These observations cannot confirm termites in the ceiling, but they can show whether termite-management features have been obstructed or whether external entry conditions require investigation.
Use a comprehensive home inspection checklist as a prompt for locations, then adapt it to Australian construction and the particular ceiling symptom. It helps prevent missed areas, but it cannot replace a roof-void assessment where access is restricted or damage is concealed. Where roof geometry or height limits a ground inspection, drone roof inspections can document external roof conditions without sending someone onto the roof.
Enter the roof space only if it's safe
Switch off relevant power where practical and identify electrical hazards before moving. Never walk on plasterboard or plaster. Place weight only on known structural members or properly supported boards, and keep off insulation batts. Foil-faced insulation can hide edges and create a fall risk. Live conductors may also sit beneath or beside insulation.
With a torch and phone camera, examine the underside of sarking, top plates, perimeter framing, ceiling joist ends, truss members, and penetrations. Look for mud tubes, shelter trails, galleries, hollowed timber, soil-packed cavities, frass, wings, and fresh disturbance. Leave tubes intact rather than breaking them open to test activity. Their condition and surrounding evidence are more useful undisturbed.
Record each image with:
- Room and position: Identify the ceiling bay and nearest fitting.
- Roof-space location: Note the corresponding joist, top plate, truss, or penetration.
- Condition: Record colour, texture, sound, softness, dust, tubes, wings, or live insects.
- Context: Note leaks, condensation, vents, downpipes, garden beds, and external wall locations.
Termite Damage Versus Water and Rodent Clues
A ceiling stain doesn't identify its cause. The same plasterboard can sag after a roof leak, soften through condensation, or lose support after timber has been eaten from within. The practical distinction comes from comparing pattern, material, location, smell, and roof-space evidence.
Tea-coloured halos and tide marks usually point towards water movement, especially when they sit beneath a roof penetration, plumbing line, or air-conditioning condensate path. Termite-related blotching may be more irregular, granular, or blistered, with hollow timber or soil-packed galleries nearby. Damp plasterboard often feels heavy and soft because it has absorbed water. Termite-affected material can feel papery, hollow, or crumbly without being wet.
Rodent evidence has a different character. Clean, oval or six-sided pellets in the roof void may indicate rodents, while termite frass is finer and may collect in small mounds near an affected timber member or opening. Rodent run marks can appear as dark grease along framing. Mud tubes are raised, earthen shelter trails, not grease lines.
| Indicator on ceiling or in roof void | Termite activity | Water or condensation | Rodent activity |
|---|---|---|---|
| Surface appearance | Patchy blistering, pinholes, localised distortion, or mud spotting | Tea-coloured halos, tide marks, damp sagging, or peeling finish | Usually limited surface impact unless nesting or movement disturbs insulation |
| Timber or lining sound | Hollow, papery, or gritty when assessed cautiously | Damp and weakened, often with a clear leak path | Gnawing may leave wider paired grooves |
| Debris | Fine frass, soil, wings, or mud tubes | Water marks, deteriorated paint, damp insulation | Clean pellets, nesting material, and grease trails |
| Roof-space path | Galleries packed with soil or shelter trails | Staining below roof, plumbing, fan, or condensate source | Runways, droppings, nesting, and gnaw marks |
| Odour | Faint earthy or mushroom-like smell near suspected activity | Damp or musty smell | Musky odour near nesting areas |
Rodent gnaw marks tend to be wider and show paired grooves. Termite galleries commonly have a gritty, sandpaper-like interior packed with soil. If the ceiling is damp, investigate the moisture source, but don't assume moisture excludes termites. Australian pest guidance notes that termite ceiling damage can resemble water damage (termite ceiling damage and water-like signs).
If two causes remain plausible, photograph everything and obtain a licensed assessment before removing lining or ordering repairs. A roofing specialist can help you work with HIBCO ROOF LLC on leaks as a separate moisture investigation, but leak repairs alone won't resolve concealed termite activity.
Documenting the Evidence the Right Way
Good photographs turn a vague ceiling complaint into a traceable building record. Start with a wide image showing the whole room, the ceiling defect, and a recognisable feature such as a doorway or light fitting. Add the room name and date to the inspection log, not to the original image file if doing so would obscure evidence.
Follow with progressively closer images. Use a coin or tape measure for scale beside pinholes, blistering, frass, galleries, or mud tubes. Keep the scale visible without touching the suspected material. A close-up should show the defect, while a wider image should show where it sits in relation to the roof penetration, external wall, fan, or cornice.
Build a location record
Record the floor-plan position, ceiling height, nearest room opening, and corresponding roof-space member. Note nearby subfloor vents, garden beds, downpipes, roof valleys, plumbing lines, and air-conditioning equipment. These details help a pest technician, builder, or expert witness connect the ceiling symptom with possible entry or moisture paths.
Log recent rain, humidity, visible condensation, plumbing work, roof repairs, repainting, extensions, and other renovations. Keep the termite-management notice from the meter box, contract folder, or handover documents with the photographs. The notice can identify the installed protection system, its installation date, and inspection requirements, which may become important if responsibility is later disputed.
For a structured NSW defect record, use this homeowner's checklist for documenting defects alongside the termite and moisture notes.
Preserve the original record
Save original photographs untouched, retain EXIF metadata where available, and back up the files. RAW files can preserve more image information than edited exports, while a signed inspection log and timestamped voice notes help show what you observed and when. Don't rely on screenshots sent through messaging apps as your only record.
Use this order:
- Wide room view.
- Defect with scale.
- Macro detail.
- Matching roof-space view.
- Written location and condition note.
- Copies of the termite notice, inspection reports, invoices, and repair history.
Immediate Mitigation and When to Call a Professional
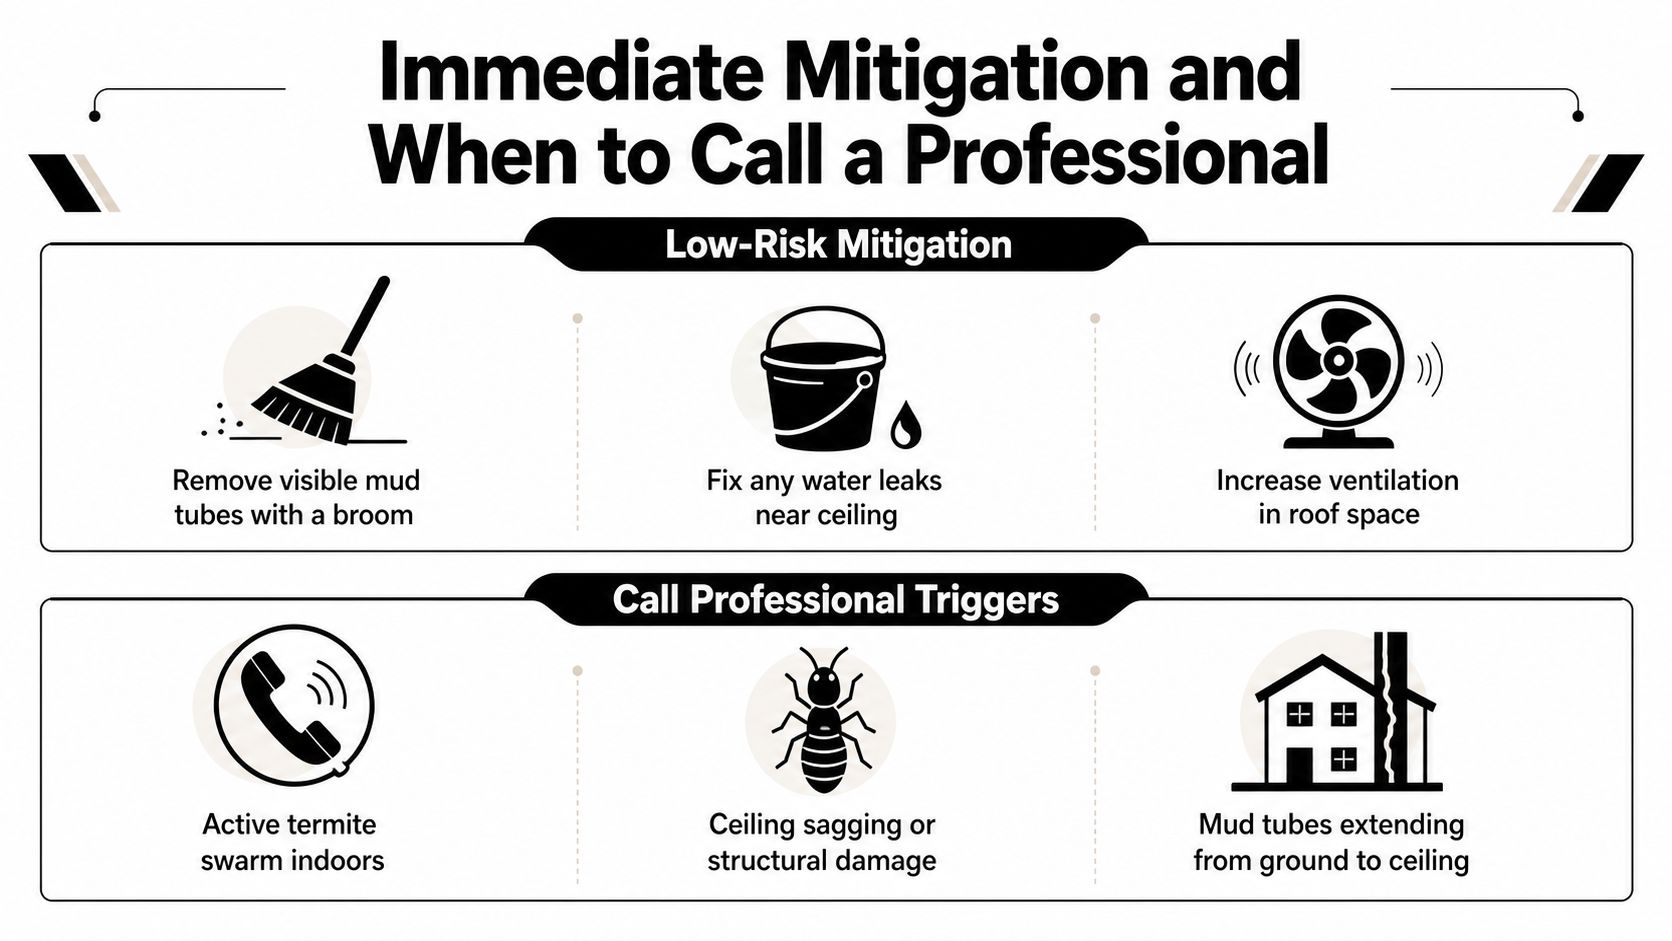
Take low-risk steps while arranging help, but don't turn an early clue into a disturbed colony or a damaged ceiling. Isolate the room if plaster is sagging, switch off ceiling fans beneath the affected area, and keep people away from any loose lining. Improve ventilation and address dripping air-conditioner condensate or an obvious leak, but avoid opening the ceiling to investigate.
Don't spray a household aerosol into holes, drill through timber, scrape away mud tubes, or break ceiling sheets. These actions can scatter activity, destroy evidence, expose wiring, and make it harder to understand the original pathway. A photograph taken before disturbance is more useful than a clean patch of ceiling after improvised treatment.
Know when the issue has moved beyond observation
Arrange a licensed pest assessment when you see live termites, recurring frass, fresh mud tubes, a swarm indoors, or activity near electrical fittings. Chemical or baiting work in NSW should be performed by a licensed pest control operator with the licence class relevant to termite work.
A building consultant or structural engineer should assess the construction when galleries affect ceiling joists, trusses, load-bearing members, top plates, or other structural timber. The pest technician identifies and treats the infestation. The building professional considers damage, movement, moisture interaction, repair scope, causation, and whether the remaining structure can safely carry its load.
The handover should include the original photographs, room map, termite notice, prior reports, roof and plumbing history, and any pest treatment proposal. Ask what the treatment covers, whether reticulation or barrier repair is relevant, how concealed areas will be approached, and what limitations apply. A post-treatment inspection at six to twelve months can help confirm the condition and identify continuing risk, but the appropriate interval should follow the treating professional's written advice and the property's protection system.
Awesim Building Consultants can be considered where the matter requires an independent building consultant in Sydney, particularly when ceiling distortion becomes part of a defect assessment or building dispute.
Reading Your Termite Management Notice and Planning Next Steps
The termite-management notice is more than a document to file away. Under the National Construction Code, termite-risk management involves a protection system and a durable notice identifying information such as the installed system, installation date, and inspection requirements (NCC termite risk management provisions).
Find the notice and read it against the ceiling evidence. Identify whether the nominated system is chemical, physical, or combined. Then record the stated durability or compliance period, the date of the last inspection, the recommended re-inspection interval, and any conditions the owner must maintain.
Connect the ceiling clue to the property file
A ceiling mark may indicate a barrier breach, an uninspected roof void, a moisture condition, or damage unrelated to the termite system. The notice won't diagnose the ceiling, but it tells you what protection was intended and what maintenance or inspection obligations may apply. Look for altered gardens, soil bridging, blocked inspection zones, extensions, plumbing works, penetrations, and repairs that may have changed access to the system.
Create a simple action sequence:
- Preserve the finding: Keep the dated images, roof-space notes, and inspection log together.
- Arrange assessment: Provide the pest technician with the ceiling and external observations before treatment.
- Request written scope: Ask whether the proposal includes active termites, concealed roof framing, barriers, reticulation, moisture sources, and damaged linings.
- Update the property file: Add reports, treatment documents, invoices, photographs, and the notice.
- Set the next review: Use the written treatment and notice requirements to schedule the next inspection.
Early records can support a future NCAT building dispute or insurance claim because they show the owner identified a symptom, investigated it, and responded within the property's termite-management conditions. They don't prove causation by themselves. A clear chronology gives the relevant expert a stronger foundation for distinguishing termite damage from water, condensation, poor workmanship, or later alteration.
For NSW disputes, check the procedural direction and orders applying to the proceeding before preparing expert evidence or a Scott Schedule. NCAT's Procedural Direction 3 was superseded for the period from 11 September 2024 to 6 April 2025, so the current requirements must be confirmed from the applicable proceeding documents (NSW termite ceiling dispute and reporting context).
Awesim Building Consultants has 35+ years in Building & Construction and over 15+ years providing litigation support to homeowners, builders, and lawyers, including site investigations, Building & Construction Expert Witness Reports, and Scott Schedules. If your ceiling evidence may involve termite damage, moisture, structural timber, or a NSW building dispute, visit Awesim Building Consultants, email admin@awesim.com.au, or call 1800 293 746 to discuss the next practical step.

Related Posts

Building Handover Inspection: What to Check Before You Sign
A building handover inspection, also called a practical completion inspection (PCI), is your last chance to identify defects before you
Read More »
Retaining Wall Defects: Inspection, Evidence, and NSW Claims
Retaining wall defects range from visible cracking and leaning to hidden drainage failures that build dangerous hydrostatic pressure. In NSW,
Read More »
Building Maintenance Schedule: What Owners Must Document
A building maintenance schedule must document every asset, its required service frequency, the person responsible, and a timestamped record from
Read More »